Overview
Salesforce Commerce Cloud (SCC) Open Commerce API (OCAPI) enables you to access SCC resources. OCAPI is divided into different APIs: the Shop API allows a client to interact with the system as a shop customer or as an agent shopping on behalf of a customer, the Data API gives create/read/update/delete access to system resources, and the Meta API can be used to get a formal description of the Open Commerce API including custom attributes.
With the Shop API you interact with the API in the context of a shop customer. The Shop API, like other RESTful APIs, operates on resources. It can retrieve and manipulate the following resources, enabling you to implement storefront-related functionality.
-
Baskets
-
Categories
-
Content
-
ContentSearch
-
CustomObjects
-
Customers
-
Folders
-
GiftCertificate
-
OrderSearch
-
Orders
-
PriceAdjustmentLimits
-
ProductLists
-
ProductSearch
-
Products
-
Promotions
-
SearchSuggestion
-
Sessions
-
Site
-
Stores
Read through this user guide to understand how to set up and configure a basic flow using the connector. Track feature additions, compatibility, limitations, and API version updates with each release of the connector using the Connector Release Notes.
MuleSoft maintains this connector under the Certified support policy.
Important Concepts
This document assumes that you are familiar with Mule, Anypoint Connectors, and Anypoint Studio. To increase your familiarity with Studio, consider completing a Anypoint Studio Tutorial. This page requires basic knowledge of Mule Concepts, Elements in a Mule Flow, and Global Elements.
Hardware and Software Requirements
For hardware and software requirements, visit the Connector Release Notes.
How to Install
You can install the connector in Anypoint Studio using the instructions in Installing a Connector from Anypoint Exchange.
Upgrading from an Older Version
If you’re currently using an older version of the connector, a small popup appears in the bottom right corner of Anypoint Studio with an "Updates Available" message.
-
Click the popup and check for available updates.
-
Click the Connector version checkbox, click Next, and follow the instructions provided by the user interface.
-
Restart Studio when prompted.
-
After restarting, when creating a flow and using the connector, if you have several versions of the connector installed, you may be asked which version you would like to use. Choose the version you would like to use.
Additionally, we recommend that you keep Studio up to date with its latest version.
Connector Namespace and Schema
When designing your application in Anypoint Studio, when you drag the connector from the palette onto the Anypoint Studio canvas, Studio automatically populates the XML code with the connector namespace and schema location.
Namespace: http://www.mulesoft.org/schema/mule/salesforce-commerce-cloud-connector
Schema Location: http://www.mulesoft.org/schema/mule/salesforce-commerce-cloud-connector/current/salesforce-commerce-cloud-connector.xsd
|
Tip
|
If you are manually coding the Mule application in Studio’s XML editor or another text editor, define the namespace and schema location in the header of your Configuration XML, inside the <mule> tag.
|
<mule xmlns="http://www.mulesoft.org/schema/mule/core"
      xmlns:xsi="http://www.w3.org/2001/XMLSchema-instance"
      xmlns:connector="http://www.mulesoft.org/schema/mule/salesforce-commerce-cloud-connector"
      xsi:schemaLocation="
               http://www.mulesoft.org/schema/mule/core
               http://www.mulesoft.org/schema/mule/core/current/mule.xsd
               http://www.mulesoft.org/schema/mule/connector
               http://www.mulesoft.org/schema/mule/salesforce-commerce-cloud-connector/current/salesforce-commerce-cloud-connector.xsd">

      <!-- put your global configuration elements and flows here -->

</mule>
Note: Use current in the schema path. Studio interprets this to the current Mule version.
Maven Dependency Information
For Maven dependency management, include this XML snippet in your pom.xml file.
<dependency>
  <groupId>com.admios.connector</groupId>
  <artifactId>salesforce-commerce-cloud-connector</artifactId>
  <version>1.0.0</version>
</dependency>|
Tip
|
Inside the
|
How to Configure
Place the connector in your flow as applicable for your use case.
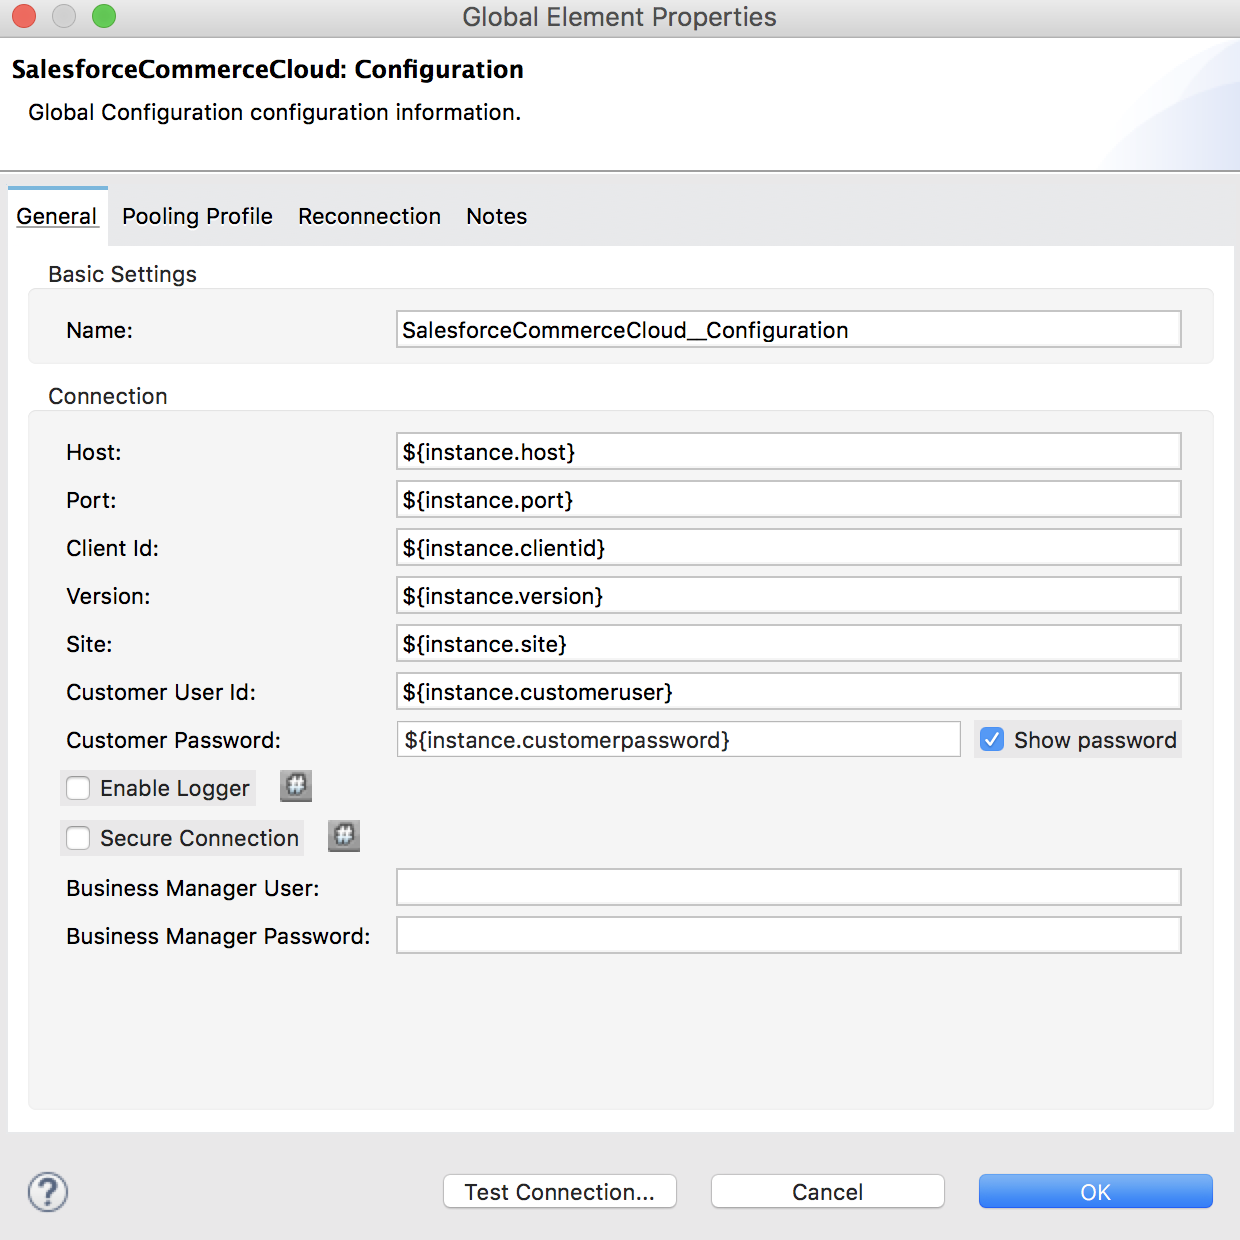
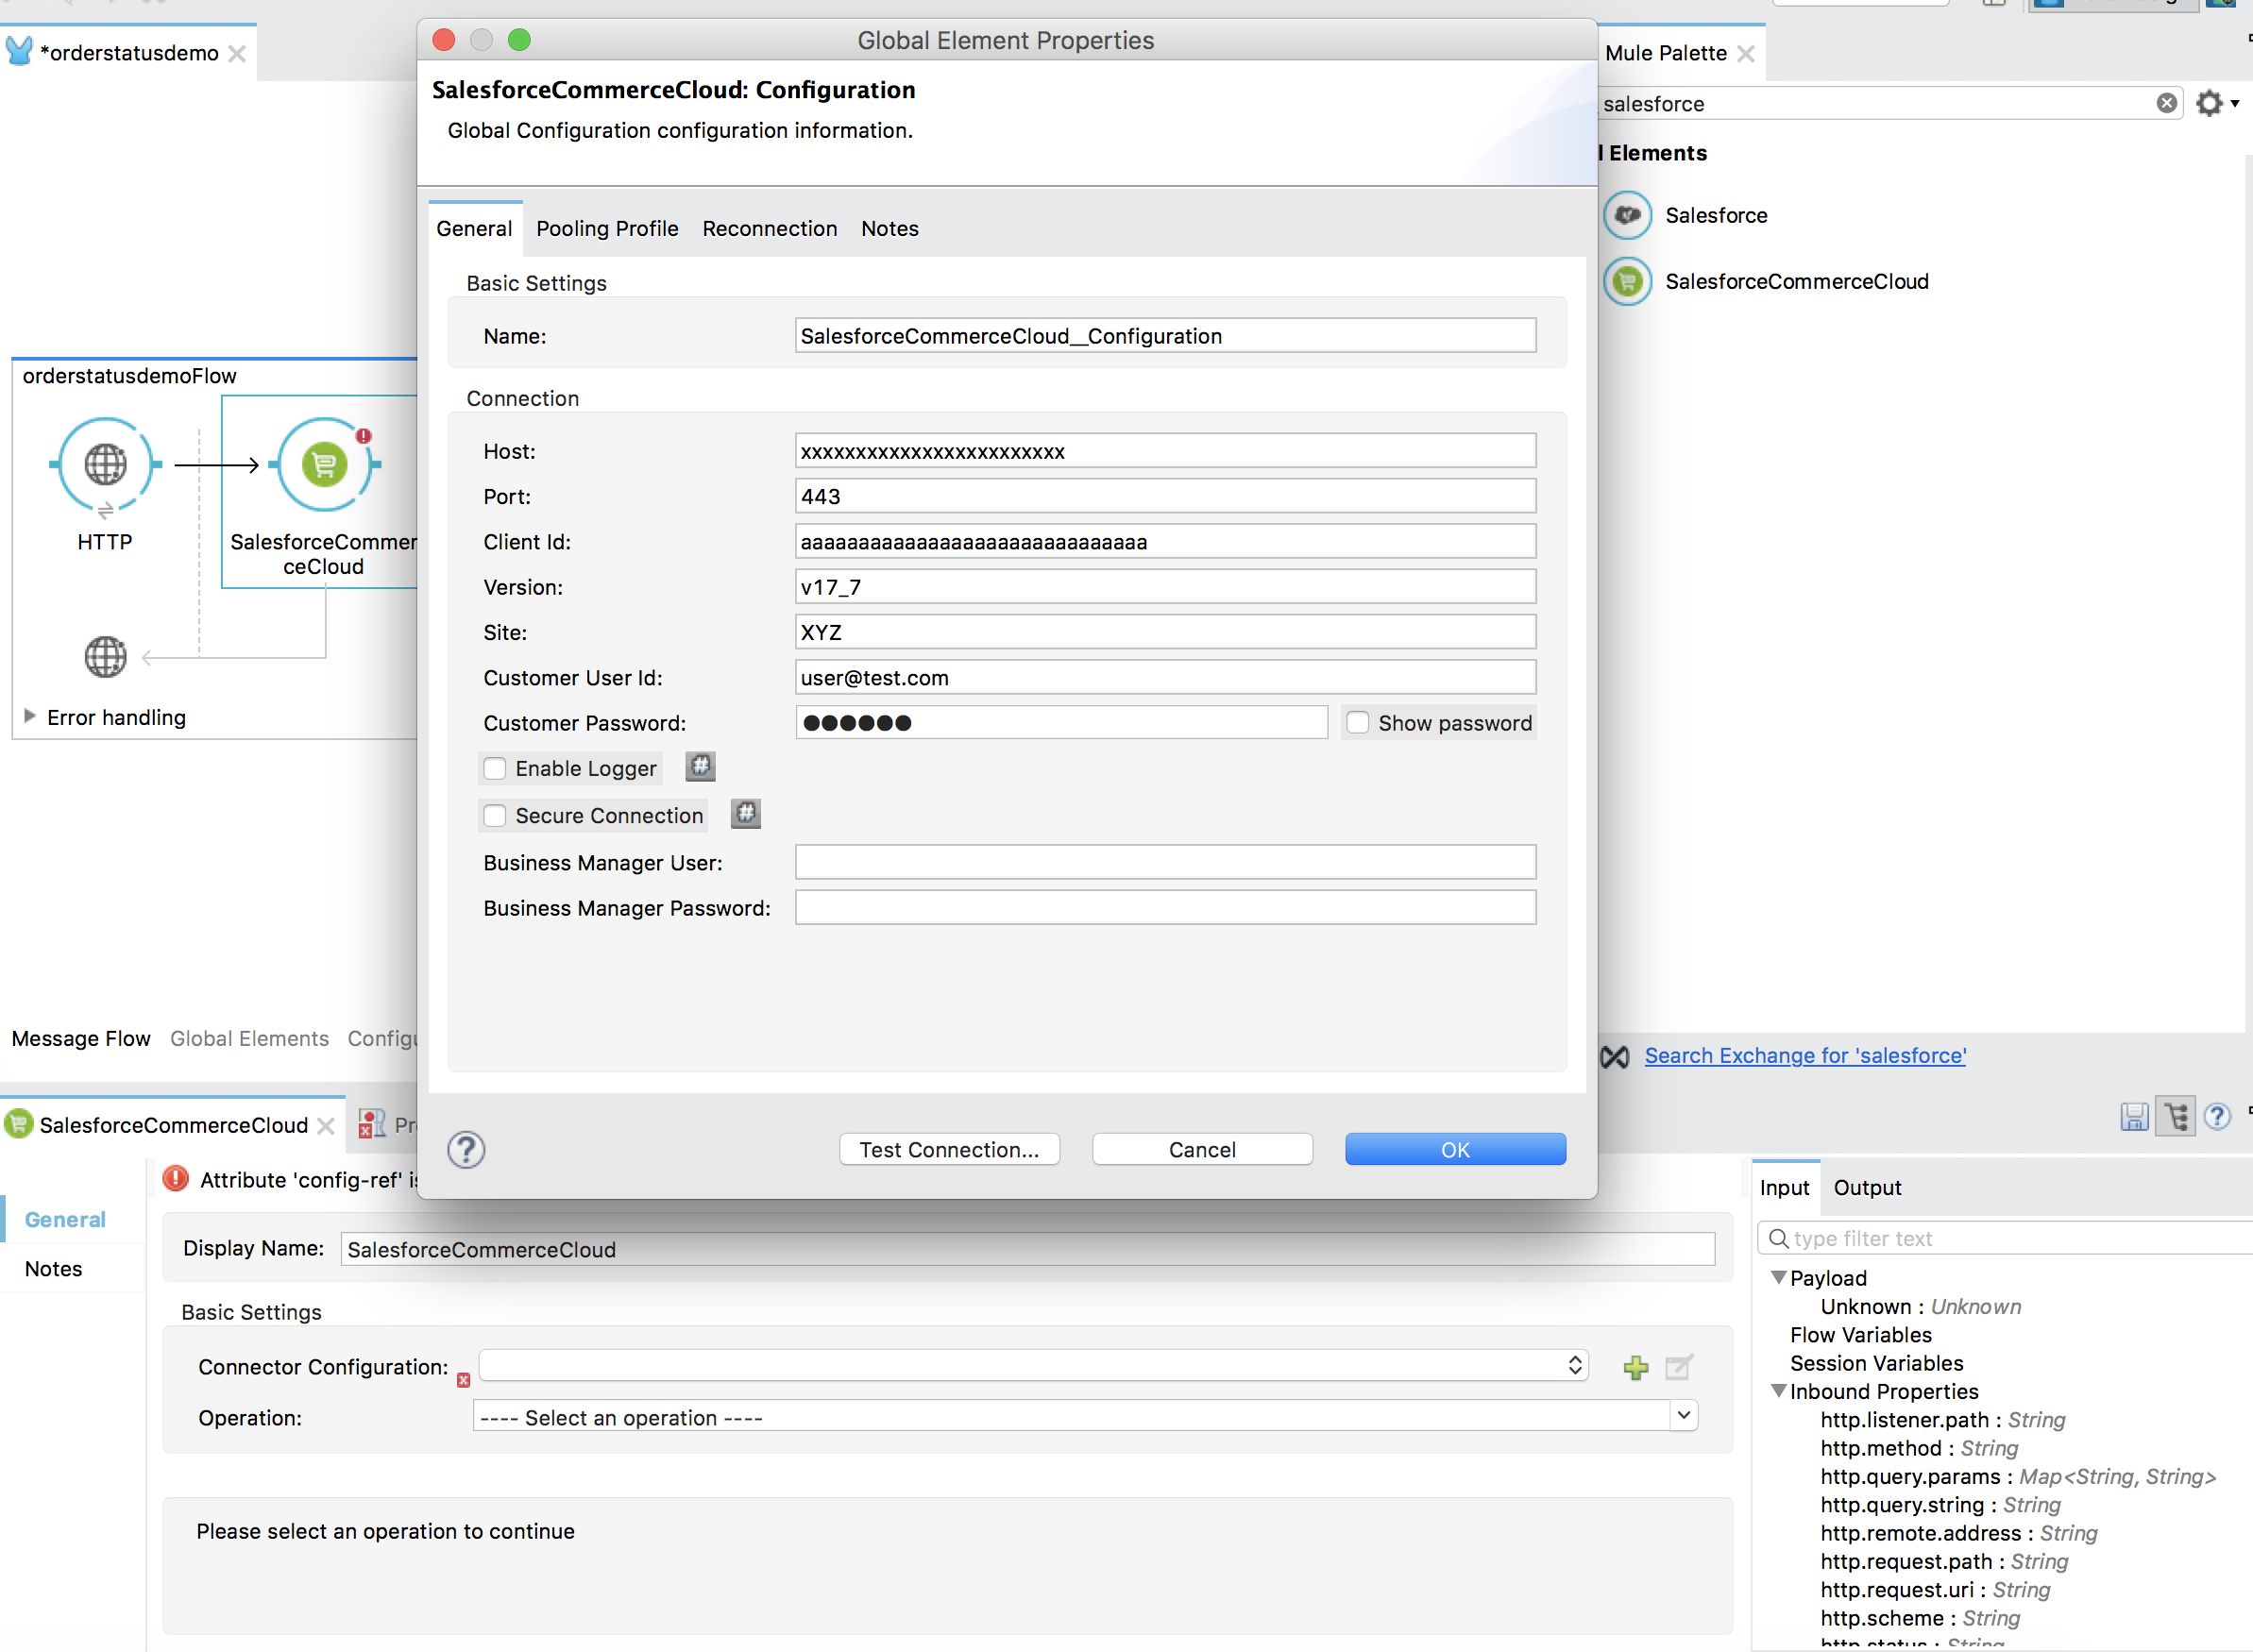
To use the Salesforce Commerce Cloud connector in your Mule application, you must configure a global Salesforce Commerce Cloud element that can be used by the Salesforce Commerce Cloud connector (read more about Global Elements). The Salesforce Commerce Cloud connector provides the following global configuration(s), requiring the following credentials: Client ID, Customer User Id, Customer Password, Business Manager User ID, Business Manager Password
| Field | Description |
|---|---|
clientId |
Enter the client ID. |
customerUserId |
Enter the corresponding user ID. |
customerPassword |
Enter the corresponding password |
businessManagerUserId |
Enter the user ID |
businessManagerPassword |
Enter the corresponding password |
Operations
Outbound, inbound, streaming outbound
|
Note
|
See a full list of operations for any version of the connector here. |
Common Use Cases
Read through the following use cases to understand how to set up commonly used SHOP API resources.
Configure Connector to get nearest stores as a guest customer
Download the deployable app archive and import into Anypoint Studio to interact with the example application.
-
Create a new Mule Project.
-
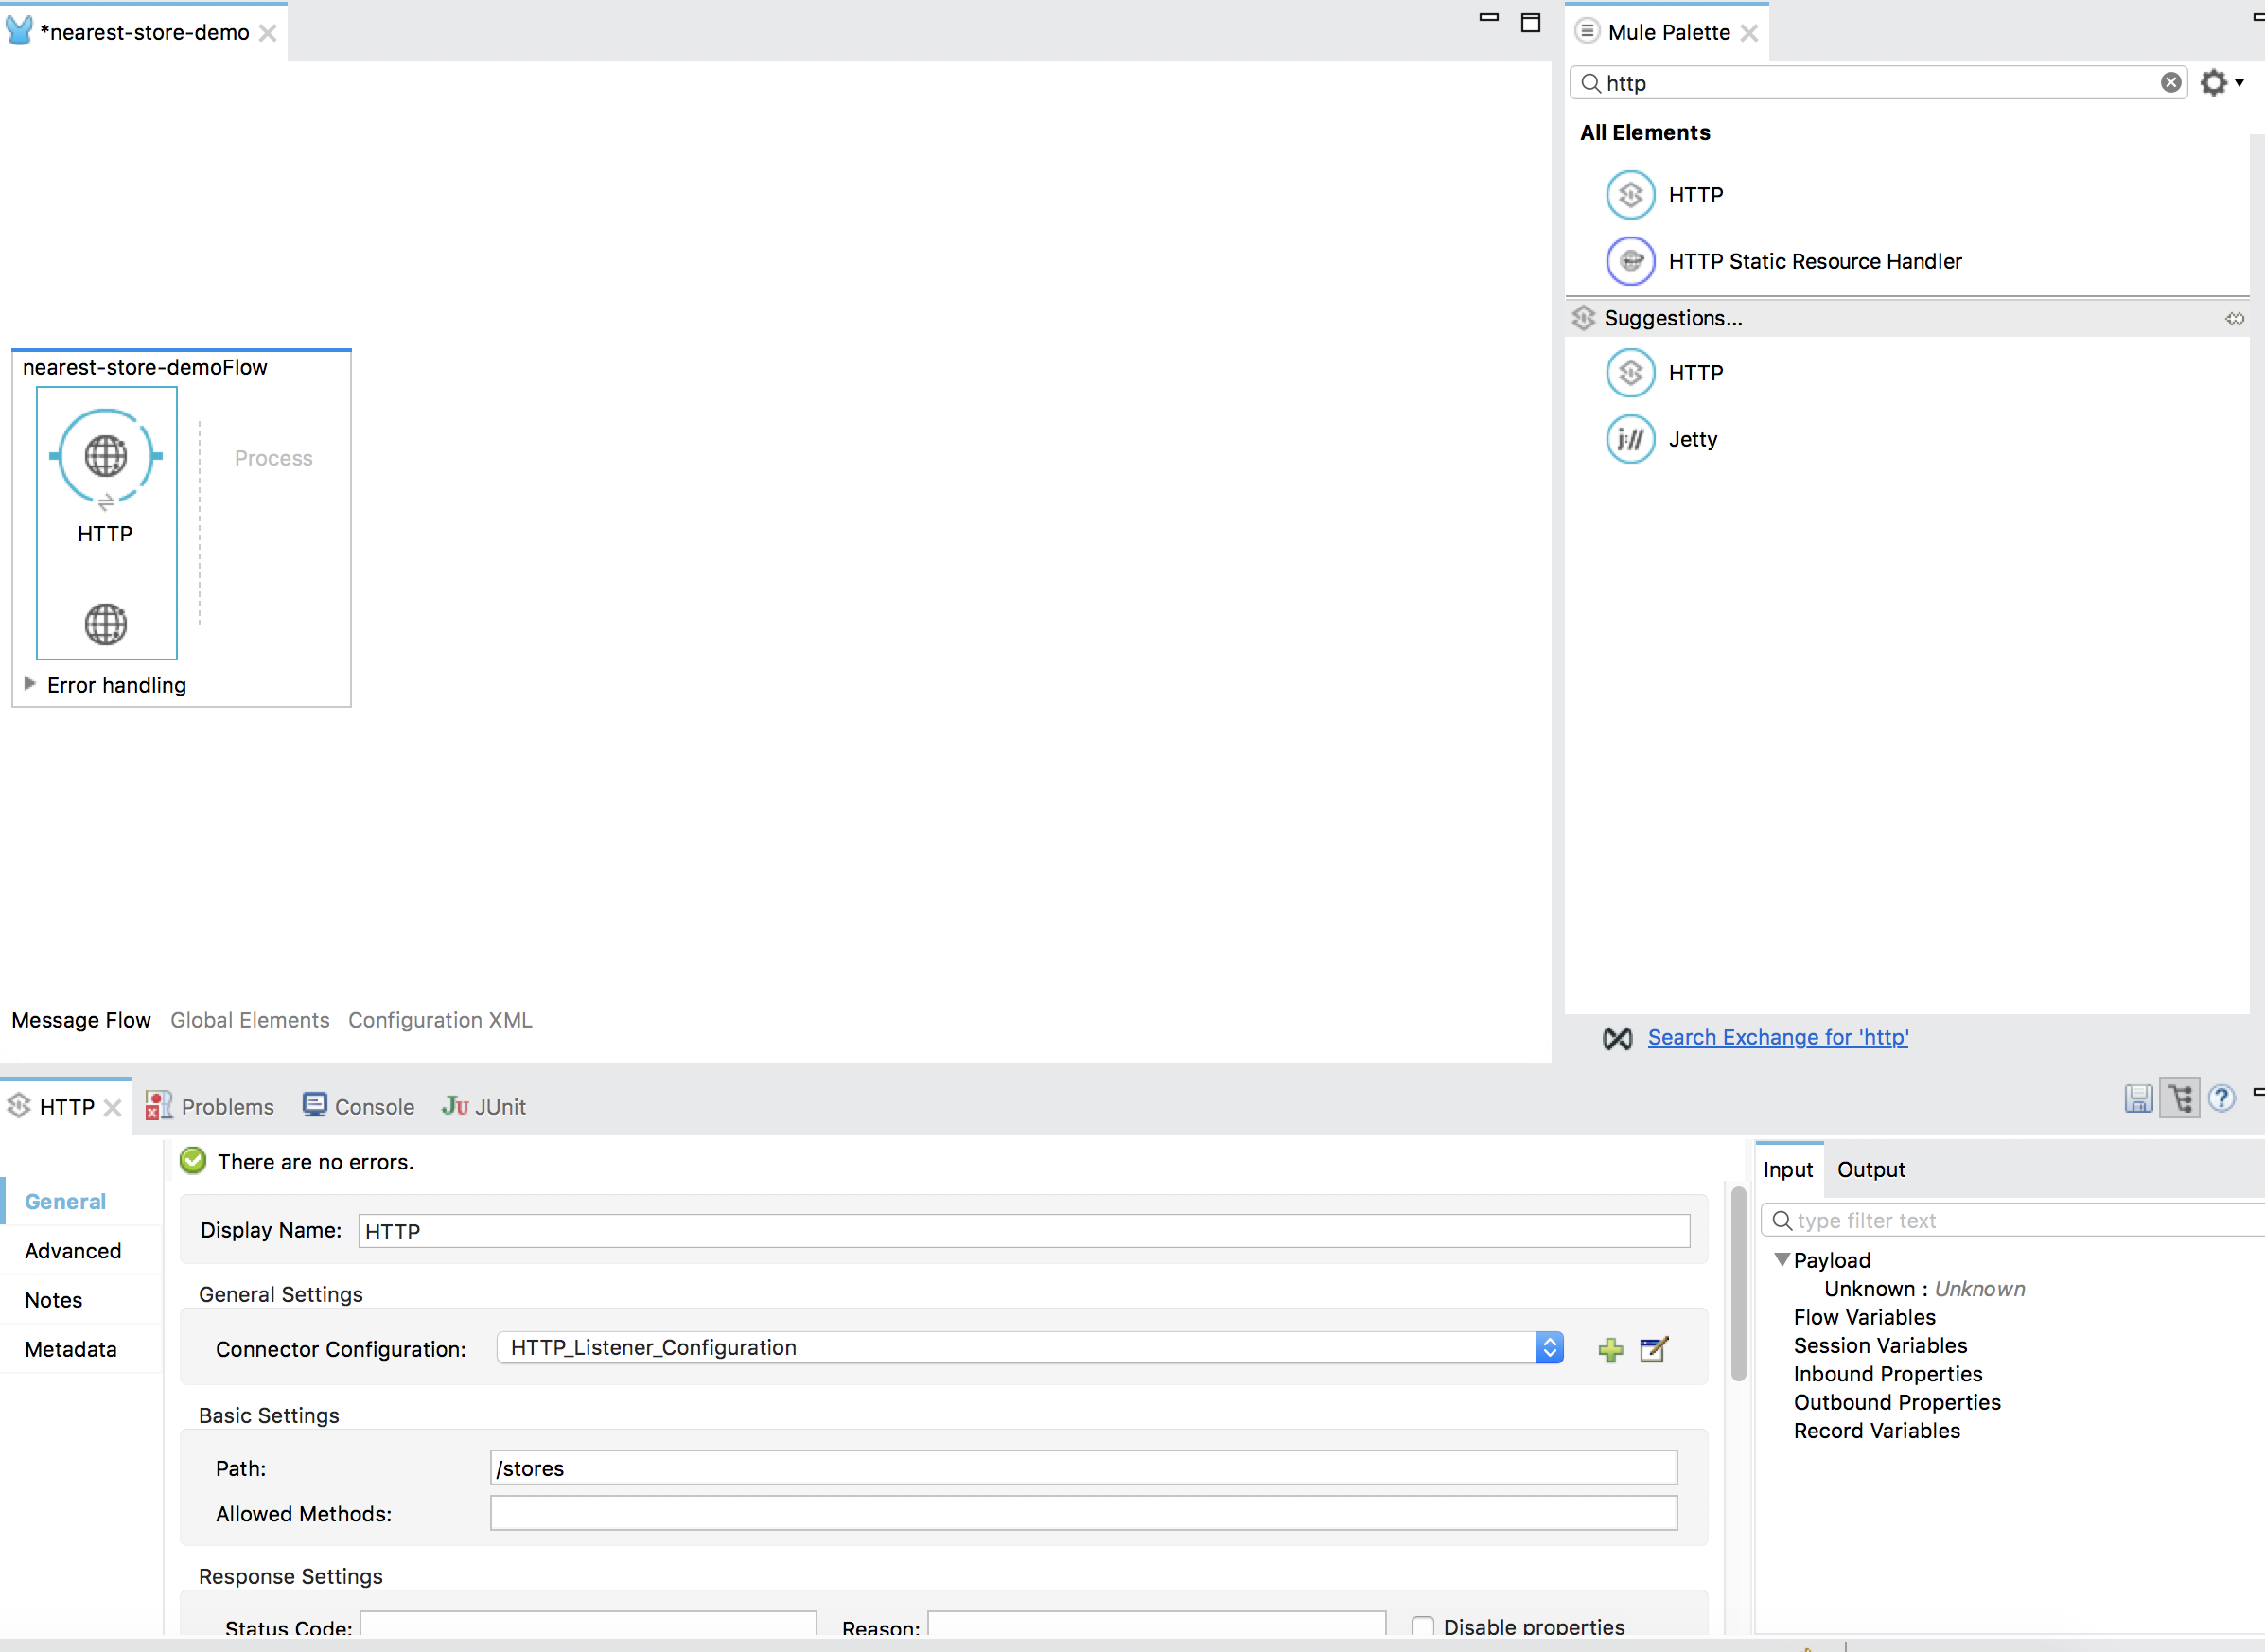
In the Mule Palette, select connectors and drag and drop HTTP Connector in to the flow designer.
-
First we need to config the HTTP request service before using it. Click on the http connector and later in the HTTP tab below.
-
Add a new HTTP Listener Configuration and set the port to 8081, back into the http connector set the Path to "/stores".
-
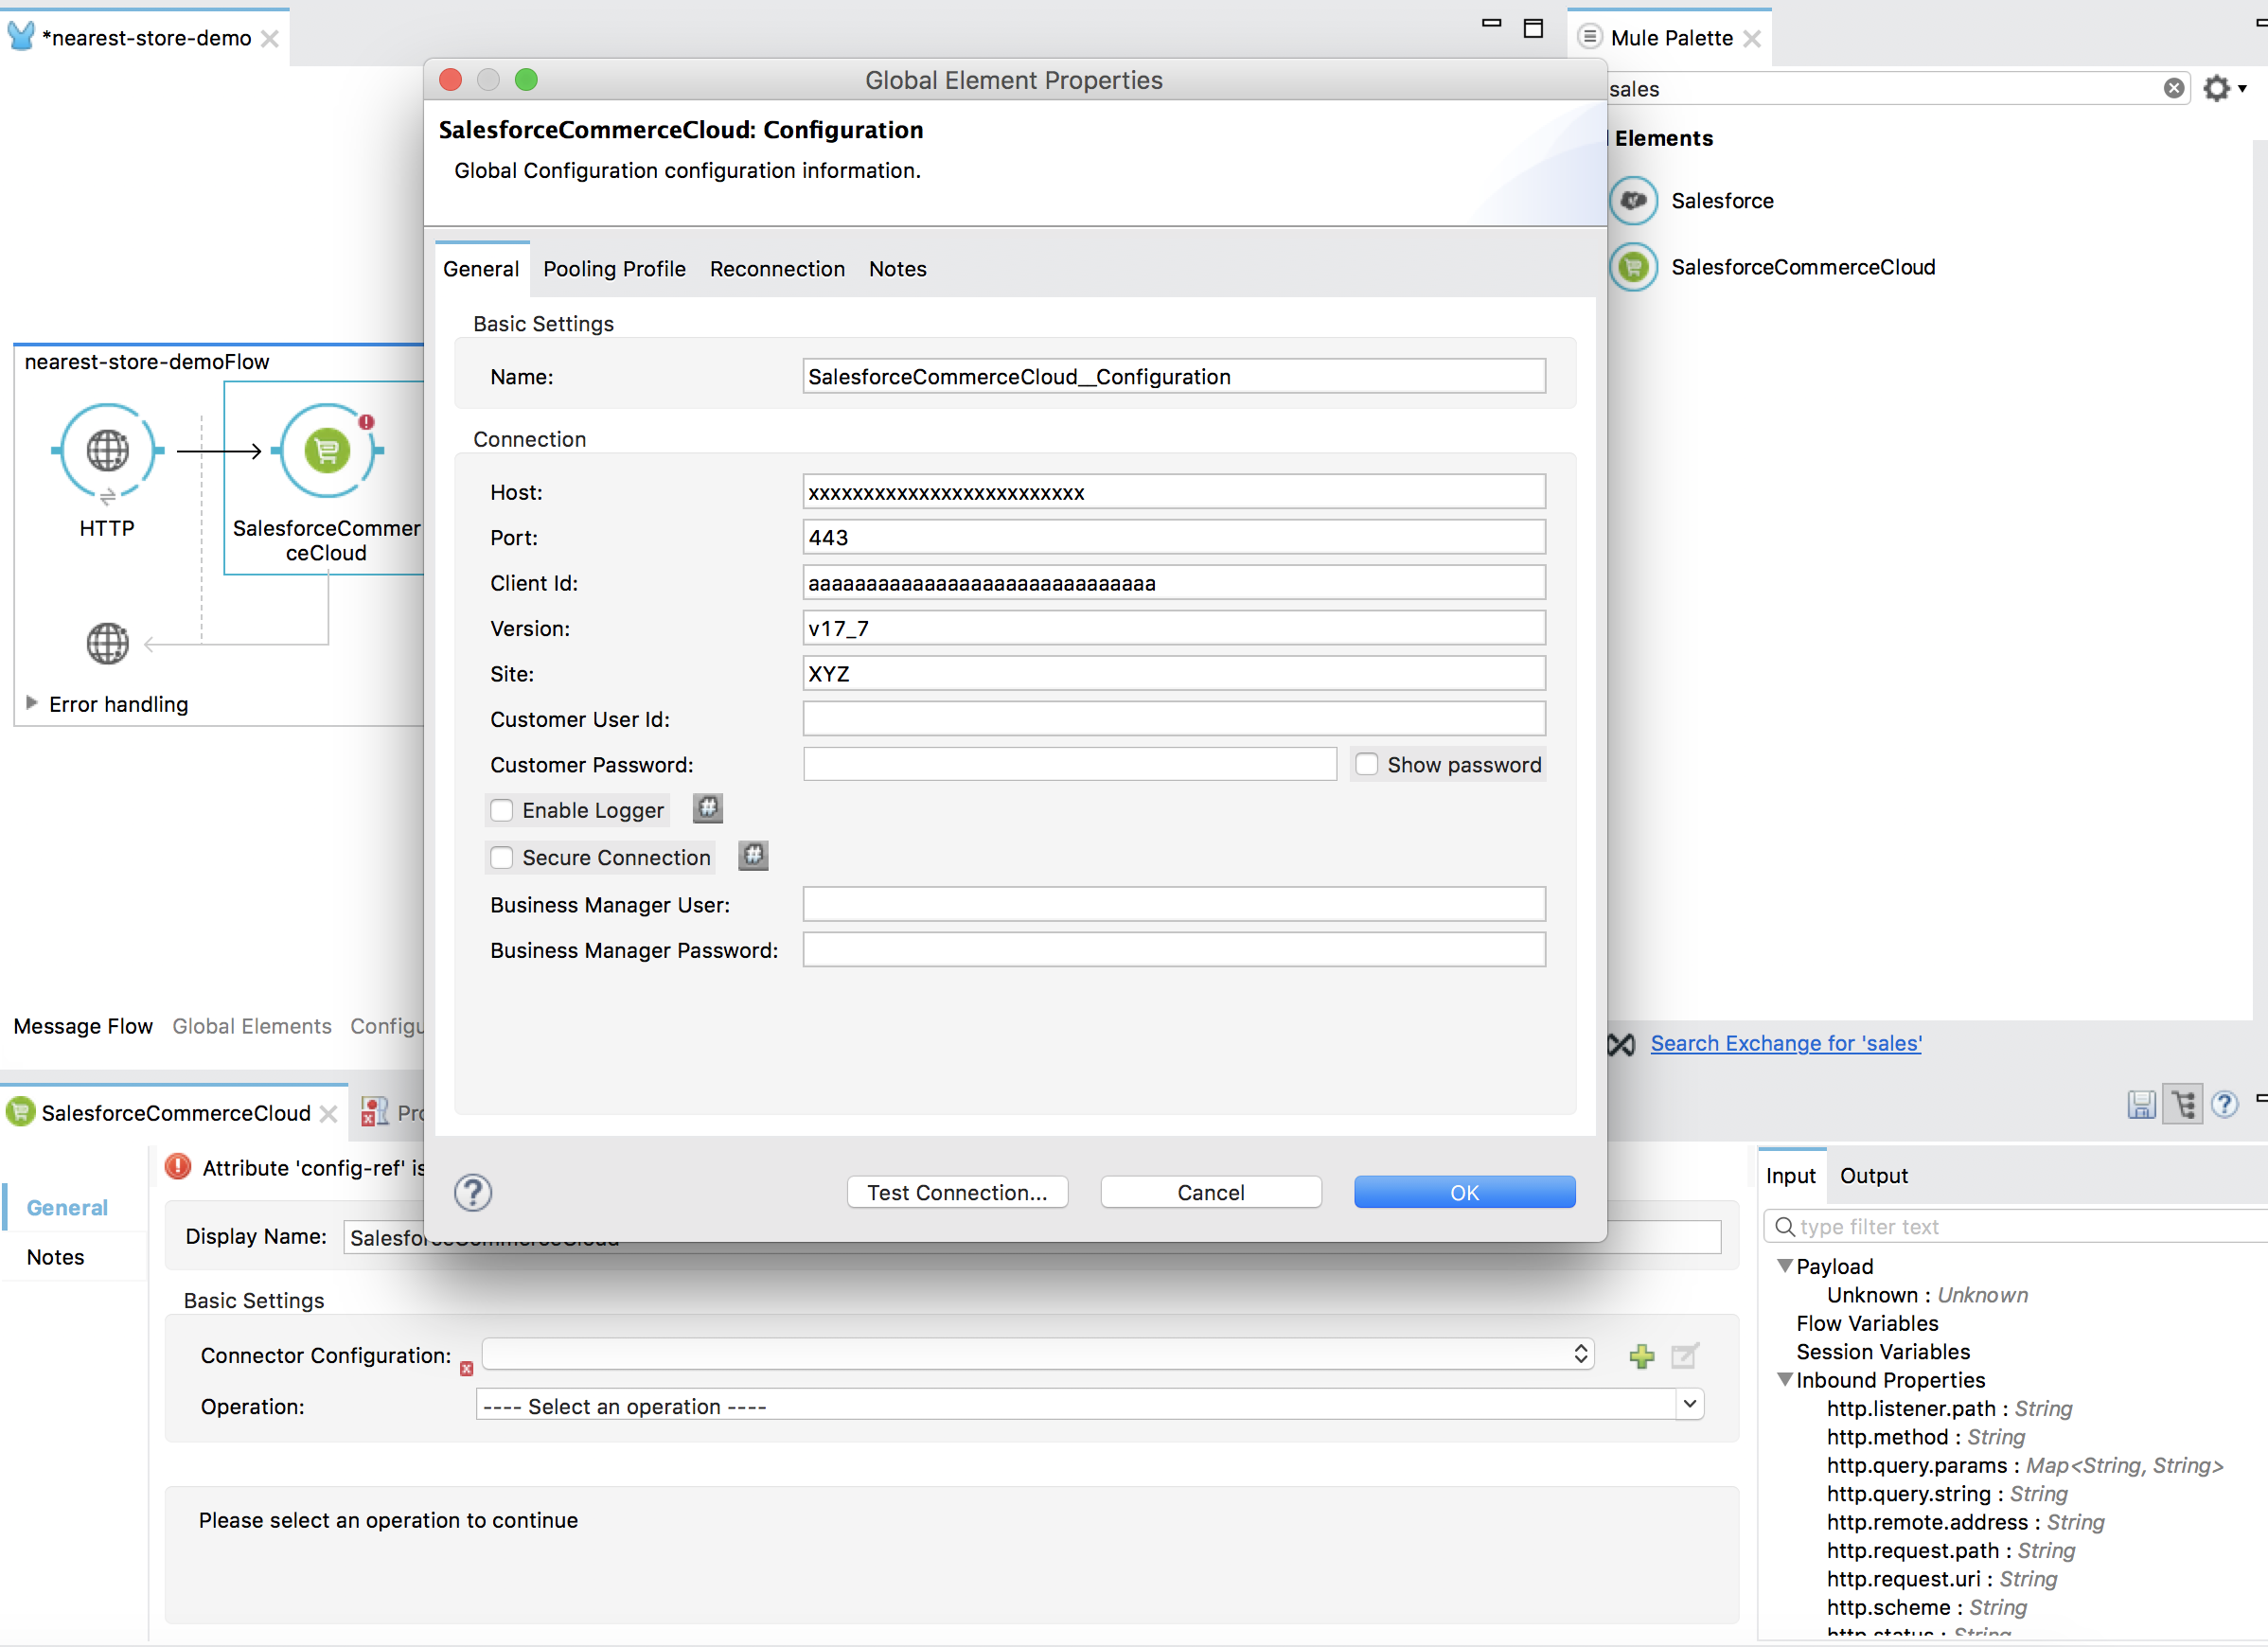
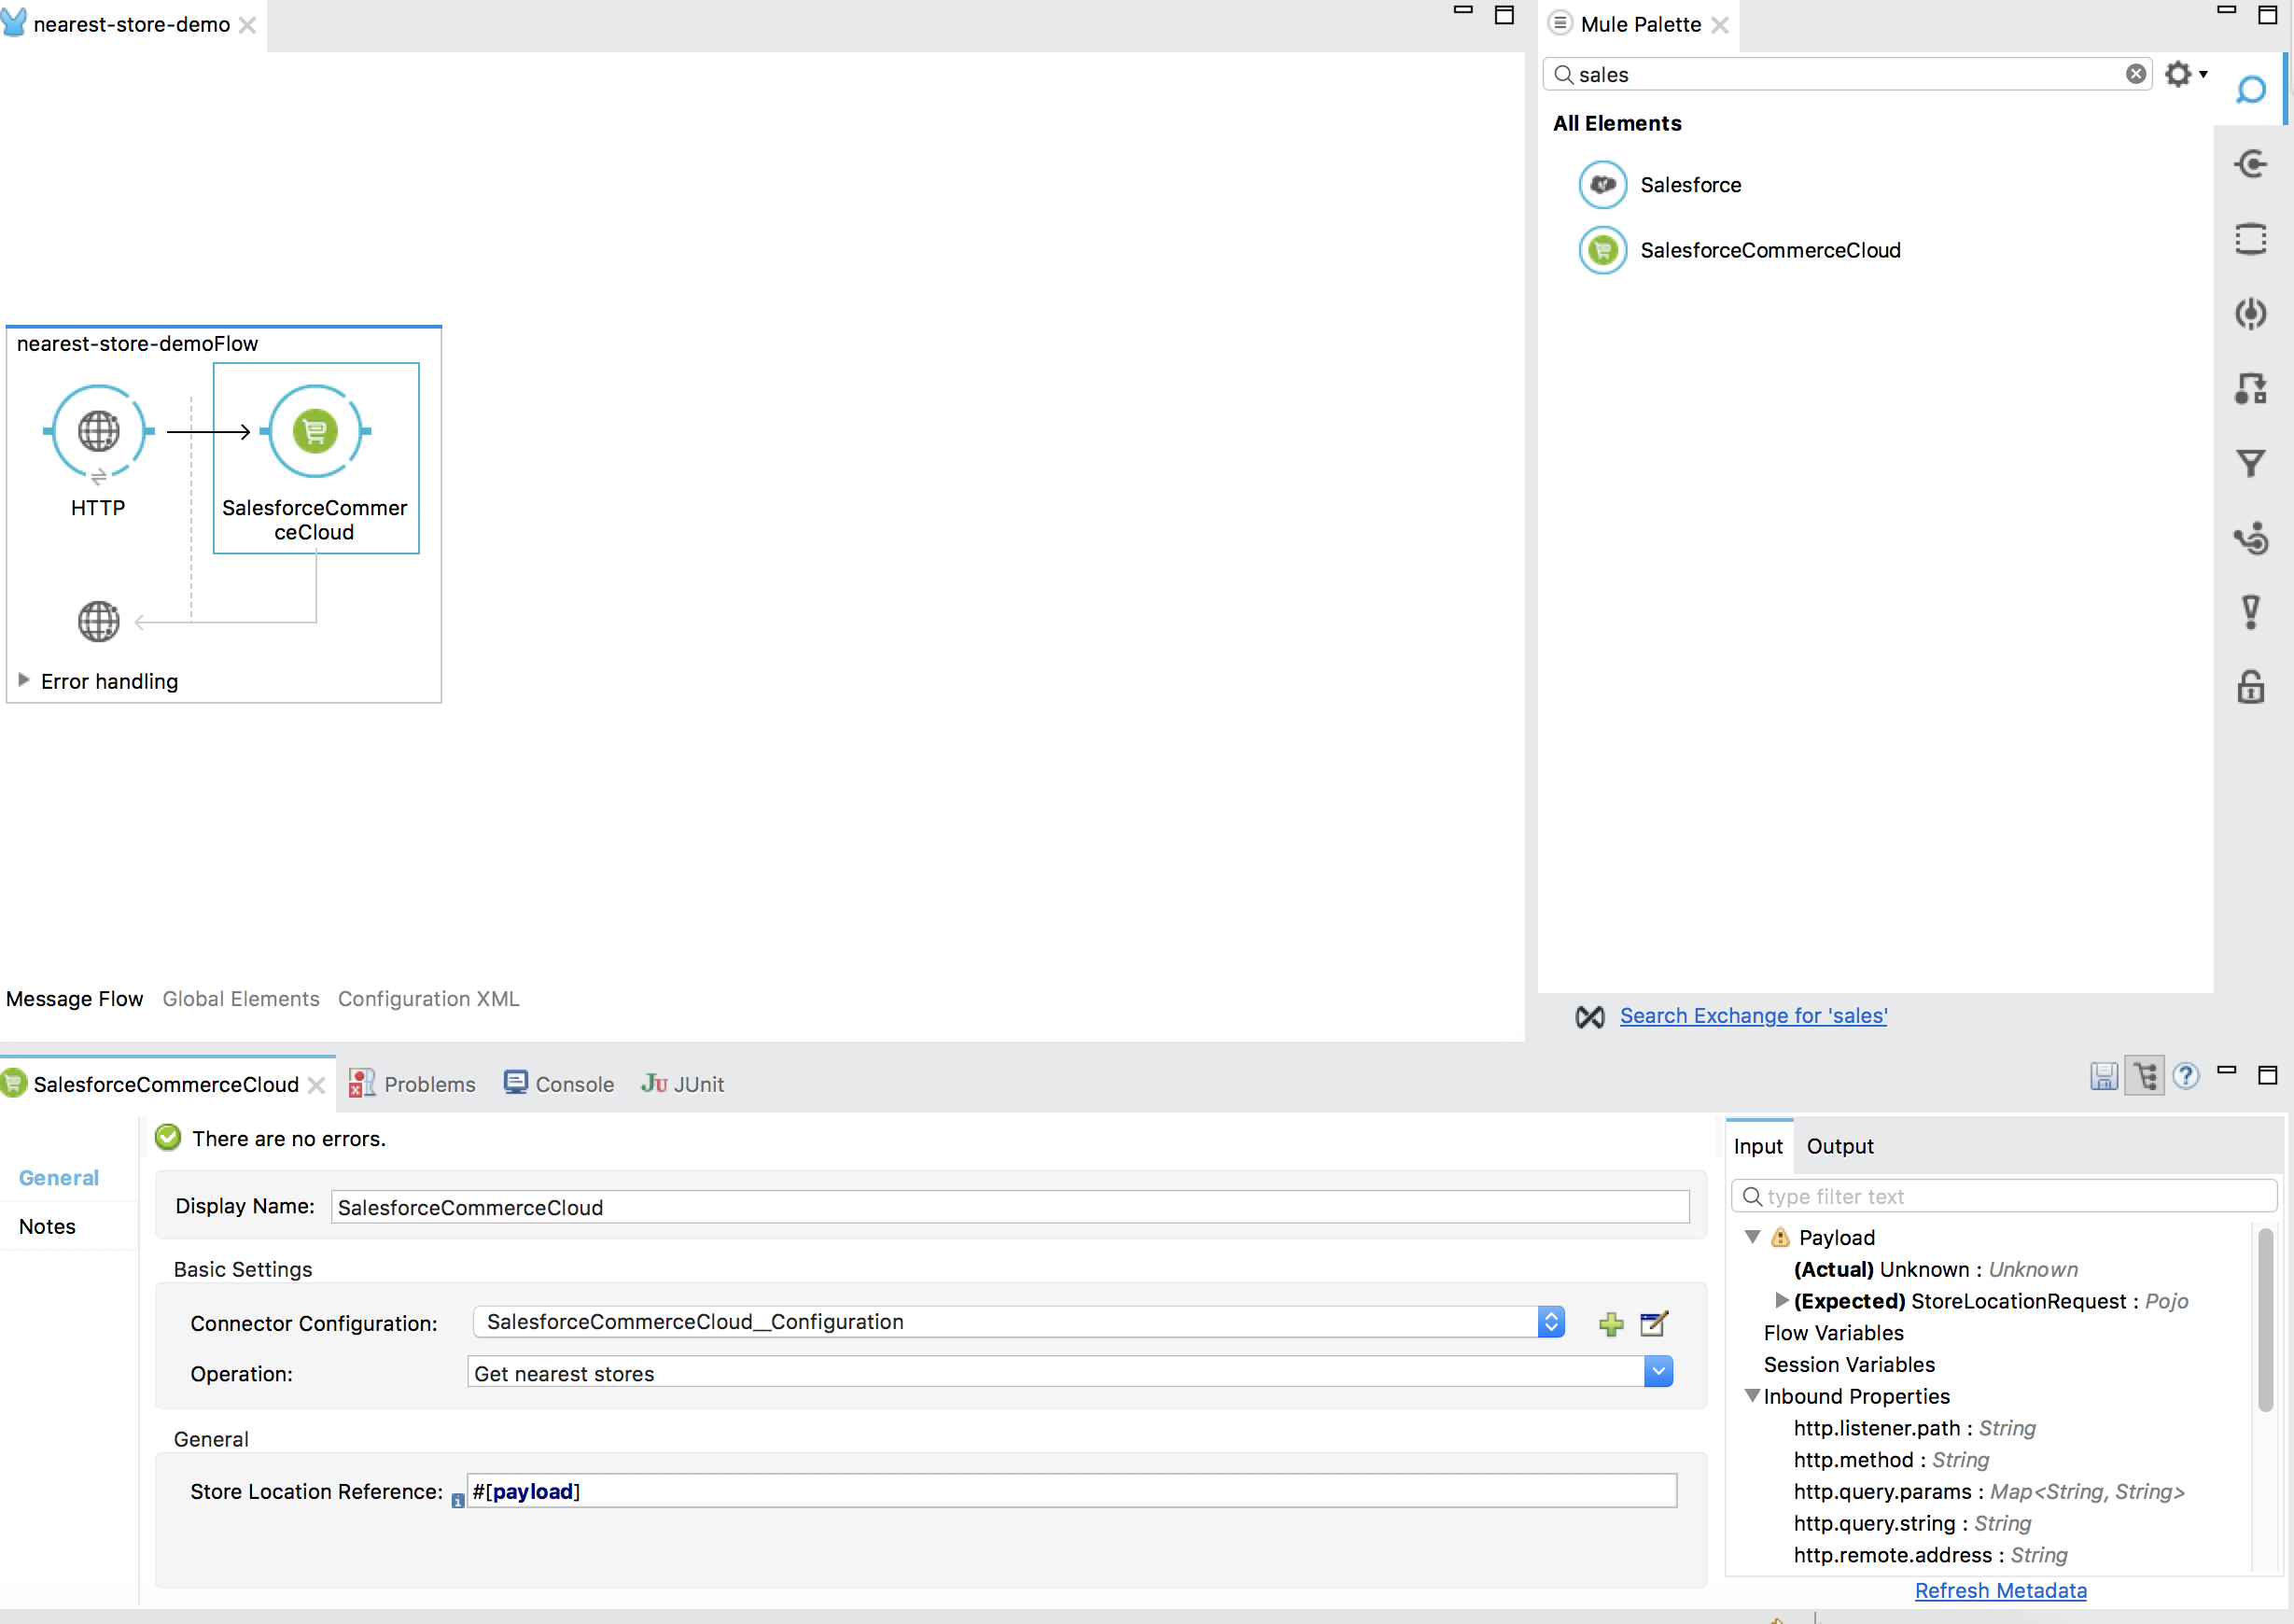
In the Mule Palette, select connectors and drag and drop Salesforce Commerce Cloud in to the flow designer, then create a new configuration and set your Credentials from your sandbox ,and select the operation Get Nearest Stores.
-
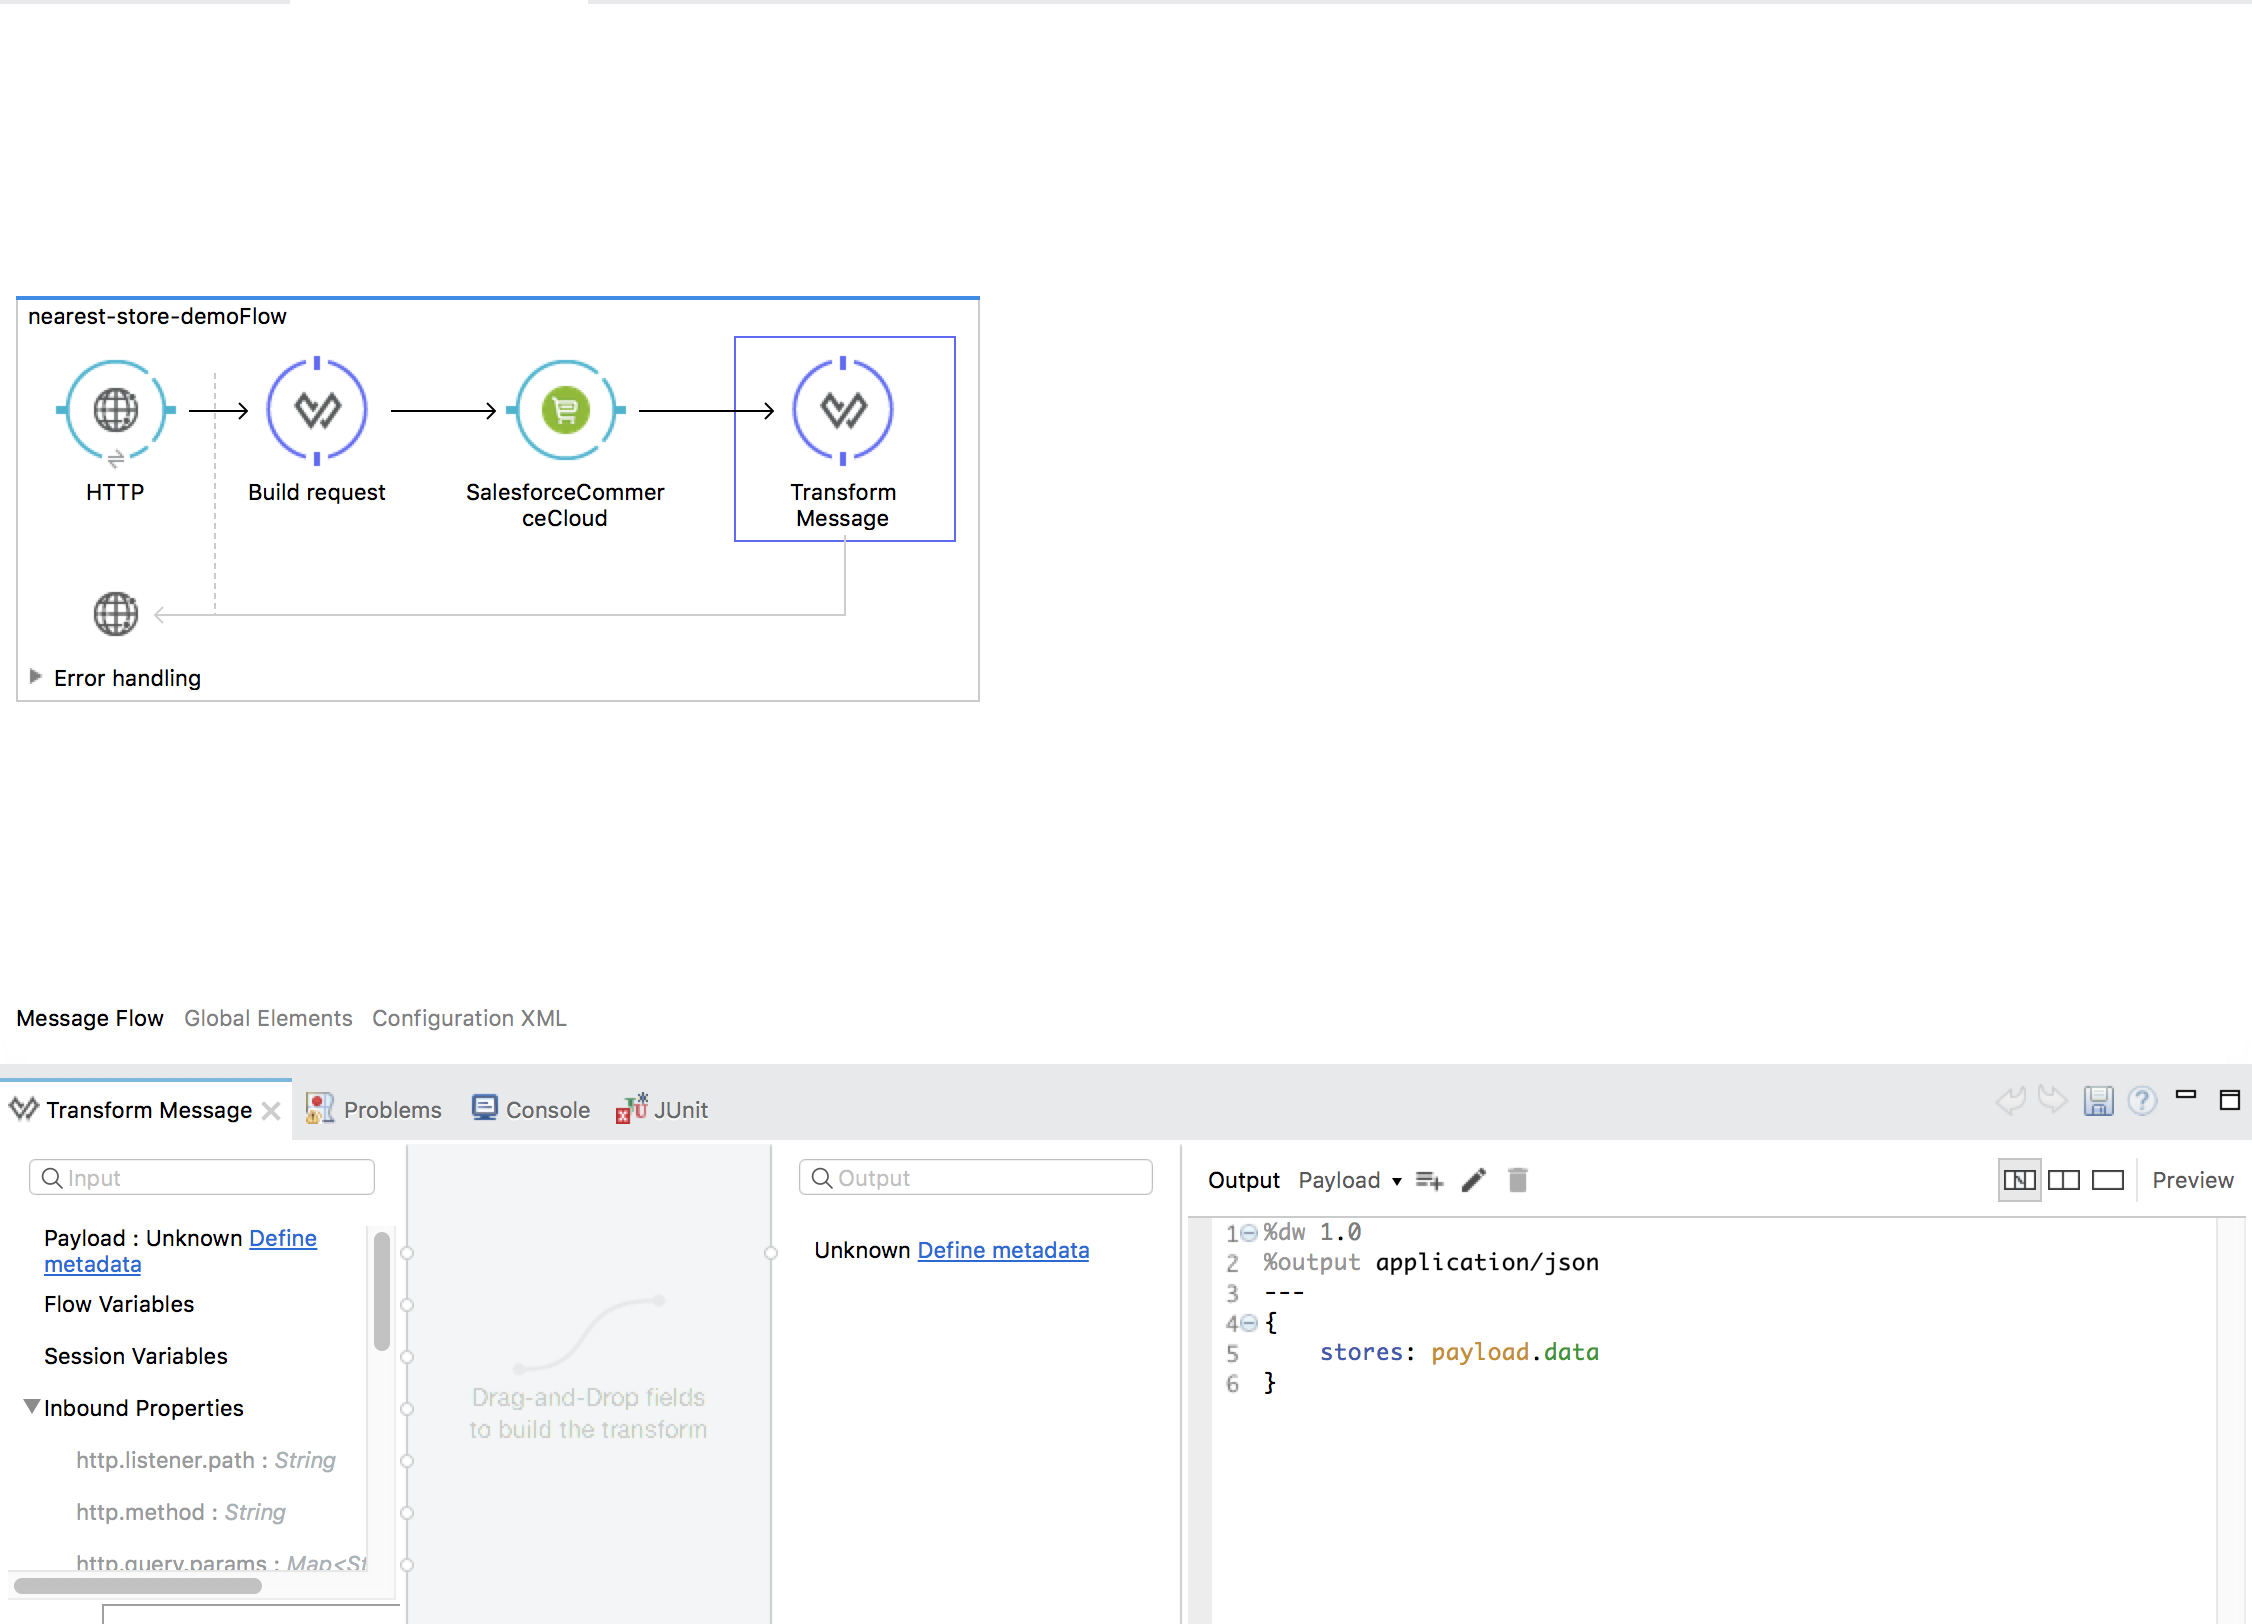
Then you can add a Transform Message and use the following snippet to add the classes for the request.
%dw 1.0
%output application/java
---
{
	countryCode: inboundProperties."http.query.params".countryCode as :string,
	postalCode: inboundProperties."http.query.params".postalCode as :string,
	maxDistance: inboundProperties."http.query.params".maxDistance as :string
} as :object {
	class : "org.mule.modules.salesforcecommercecloud.client.shop.model.request.StoreLocationRequest"
}
-
Then you can add a Transform Message and use the following snippet to extract the stores from the response.
%dw 1.0
%output application/json
---
{
	stores: payload.data
}
Configure Connector to get order status as a registered customer
-
Create a new Mule Project.
-
In the Mule Palette, select connectors and drag and drop HTTP Connector in to the flow designer.
-
First we need to config the HTTP request service before using it. Click on the http connector and later in the HTTP tab below.
-
Add a new HTTP Listener Configuration and set the port to 8081, back into the http connector set the Path to "/order".
-
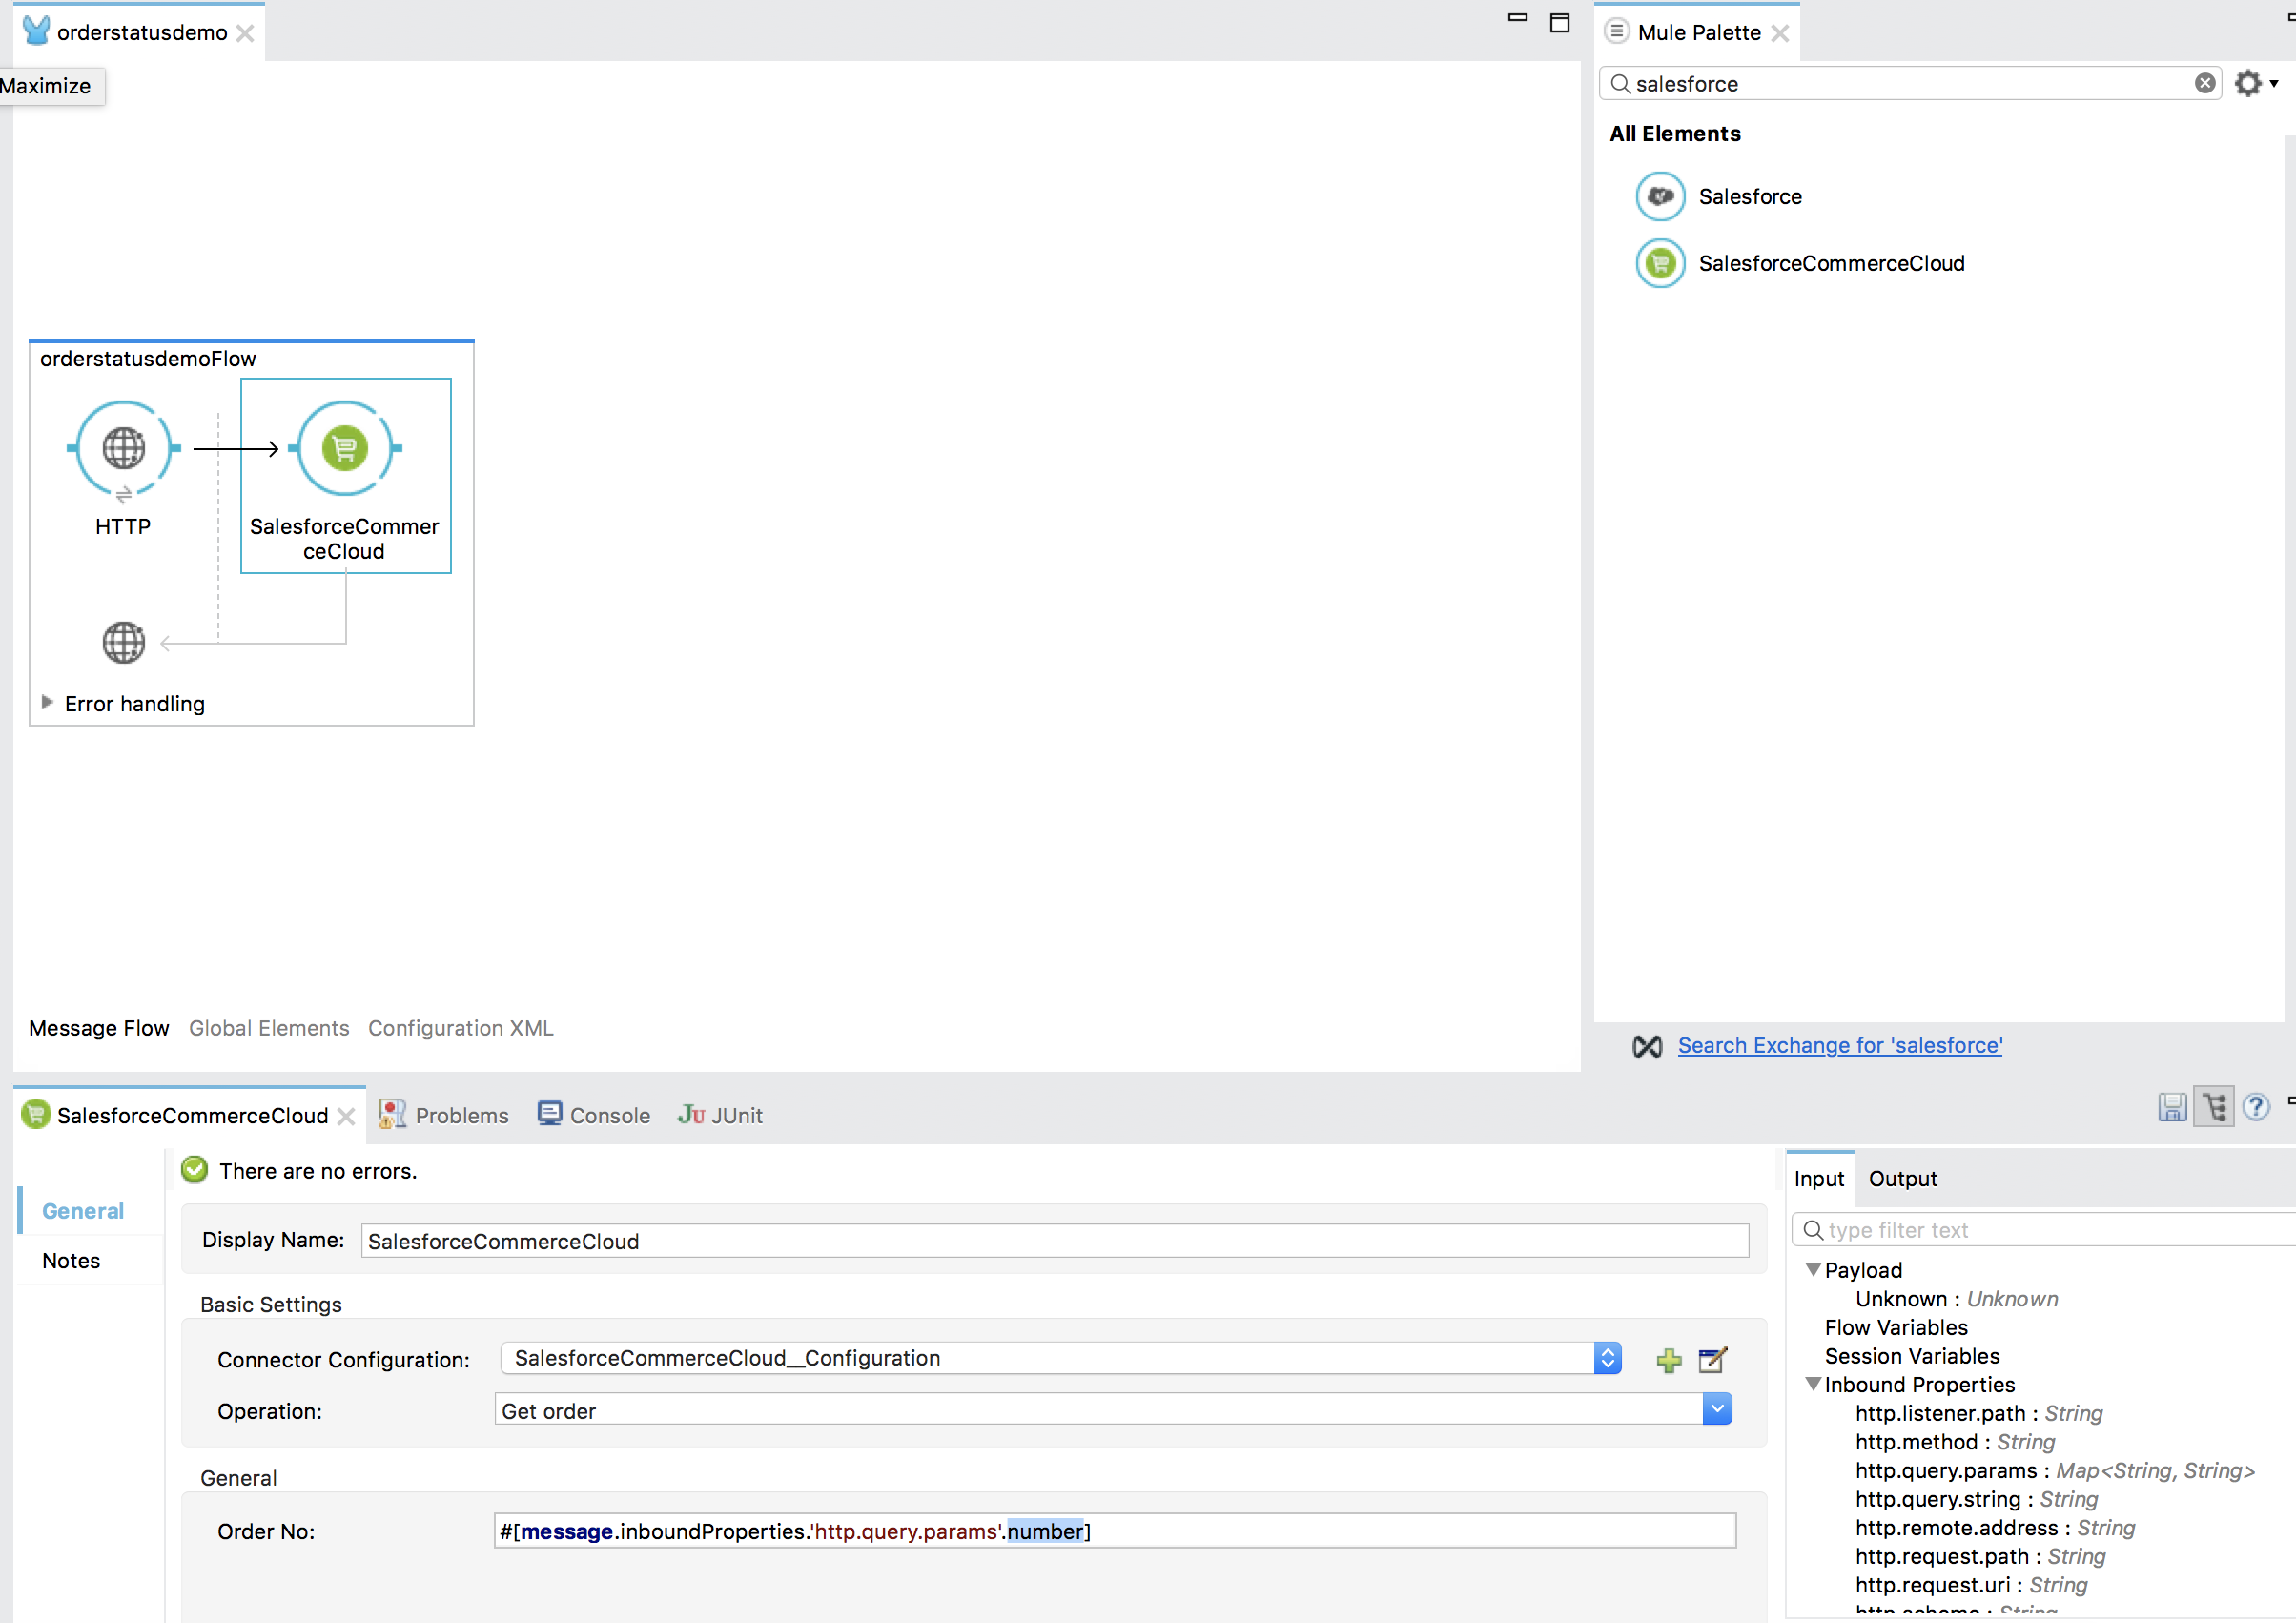
Set the OrderNo as
#[message.inboundProperties.'http.query.params'.number]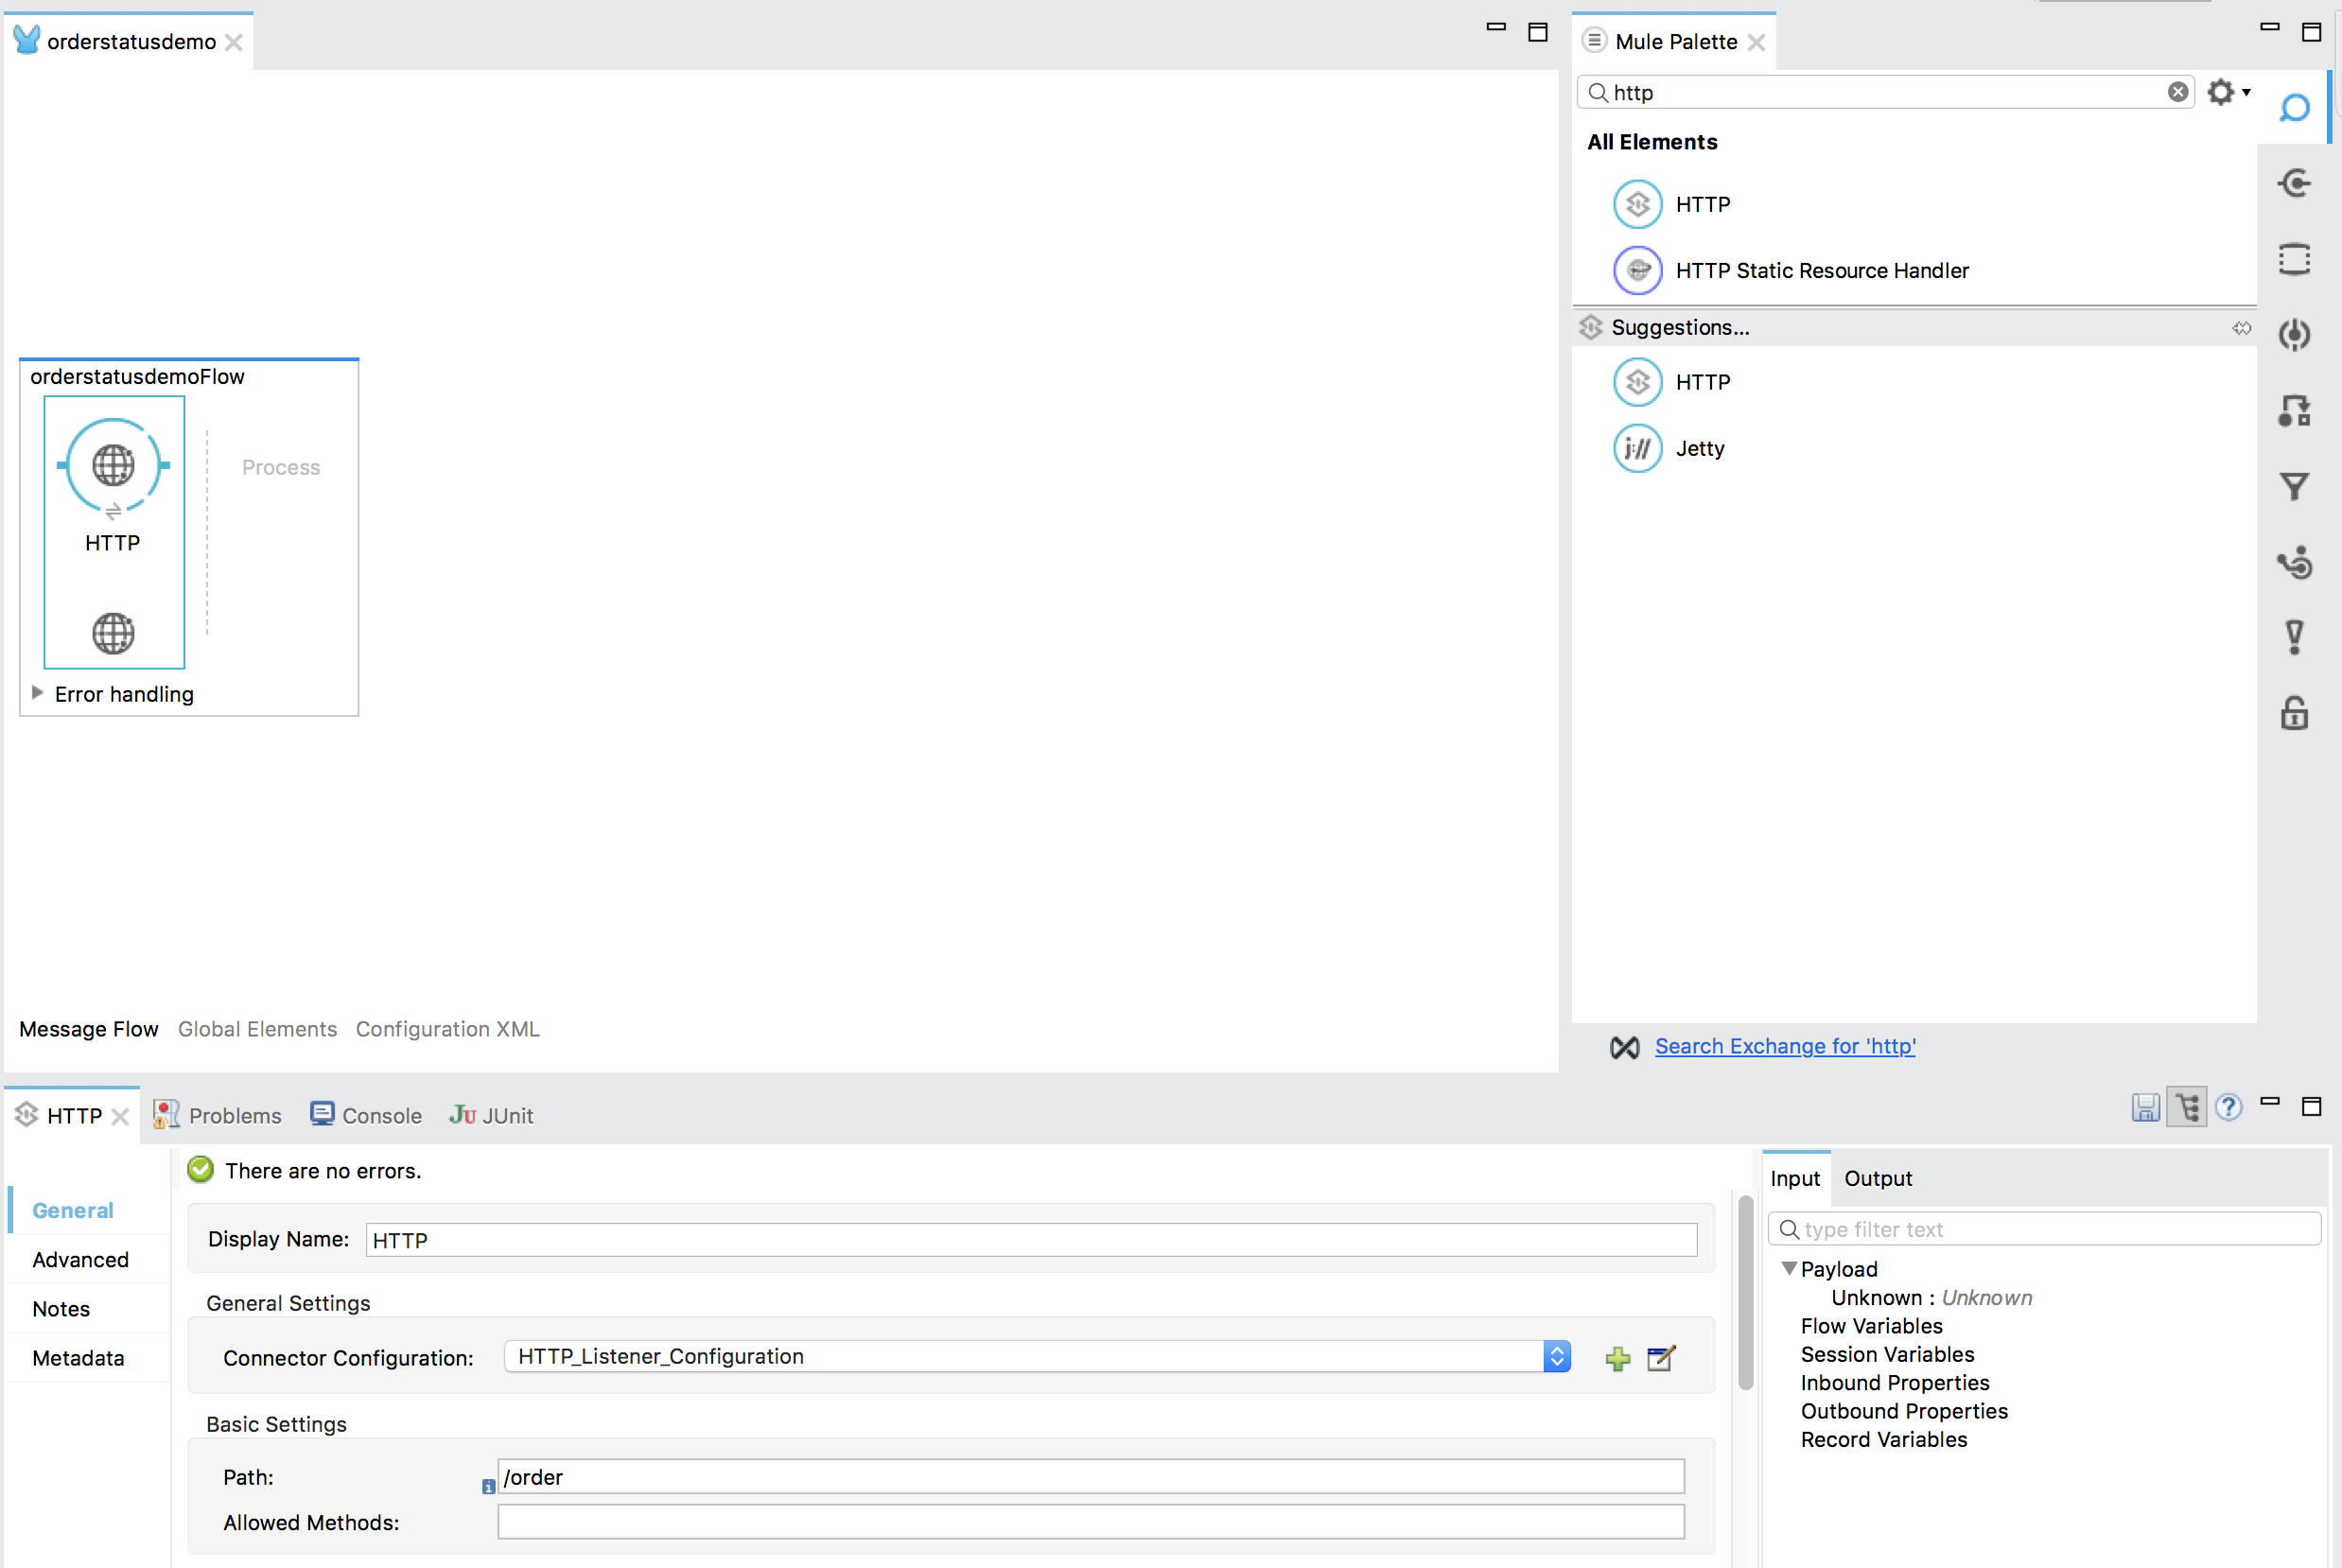
-
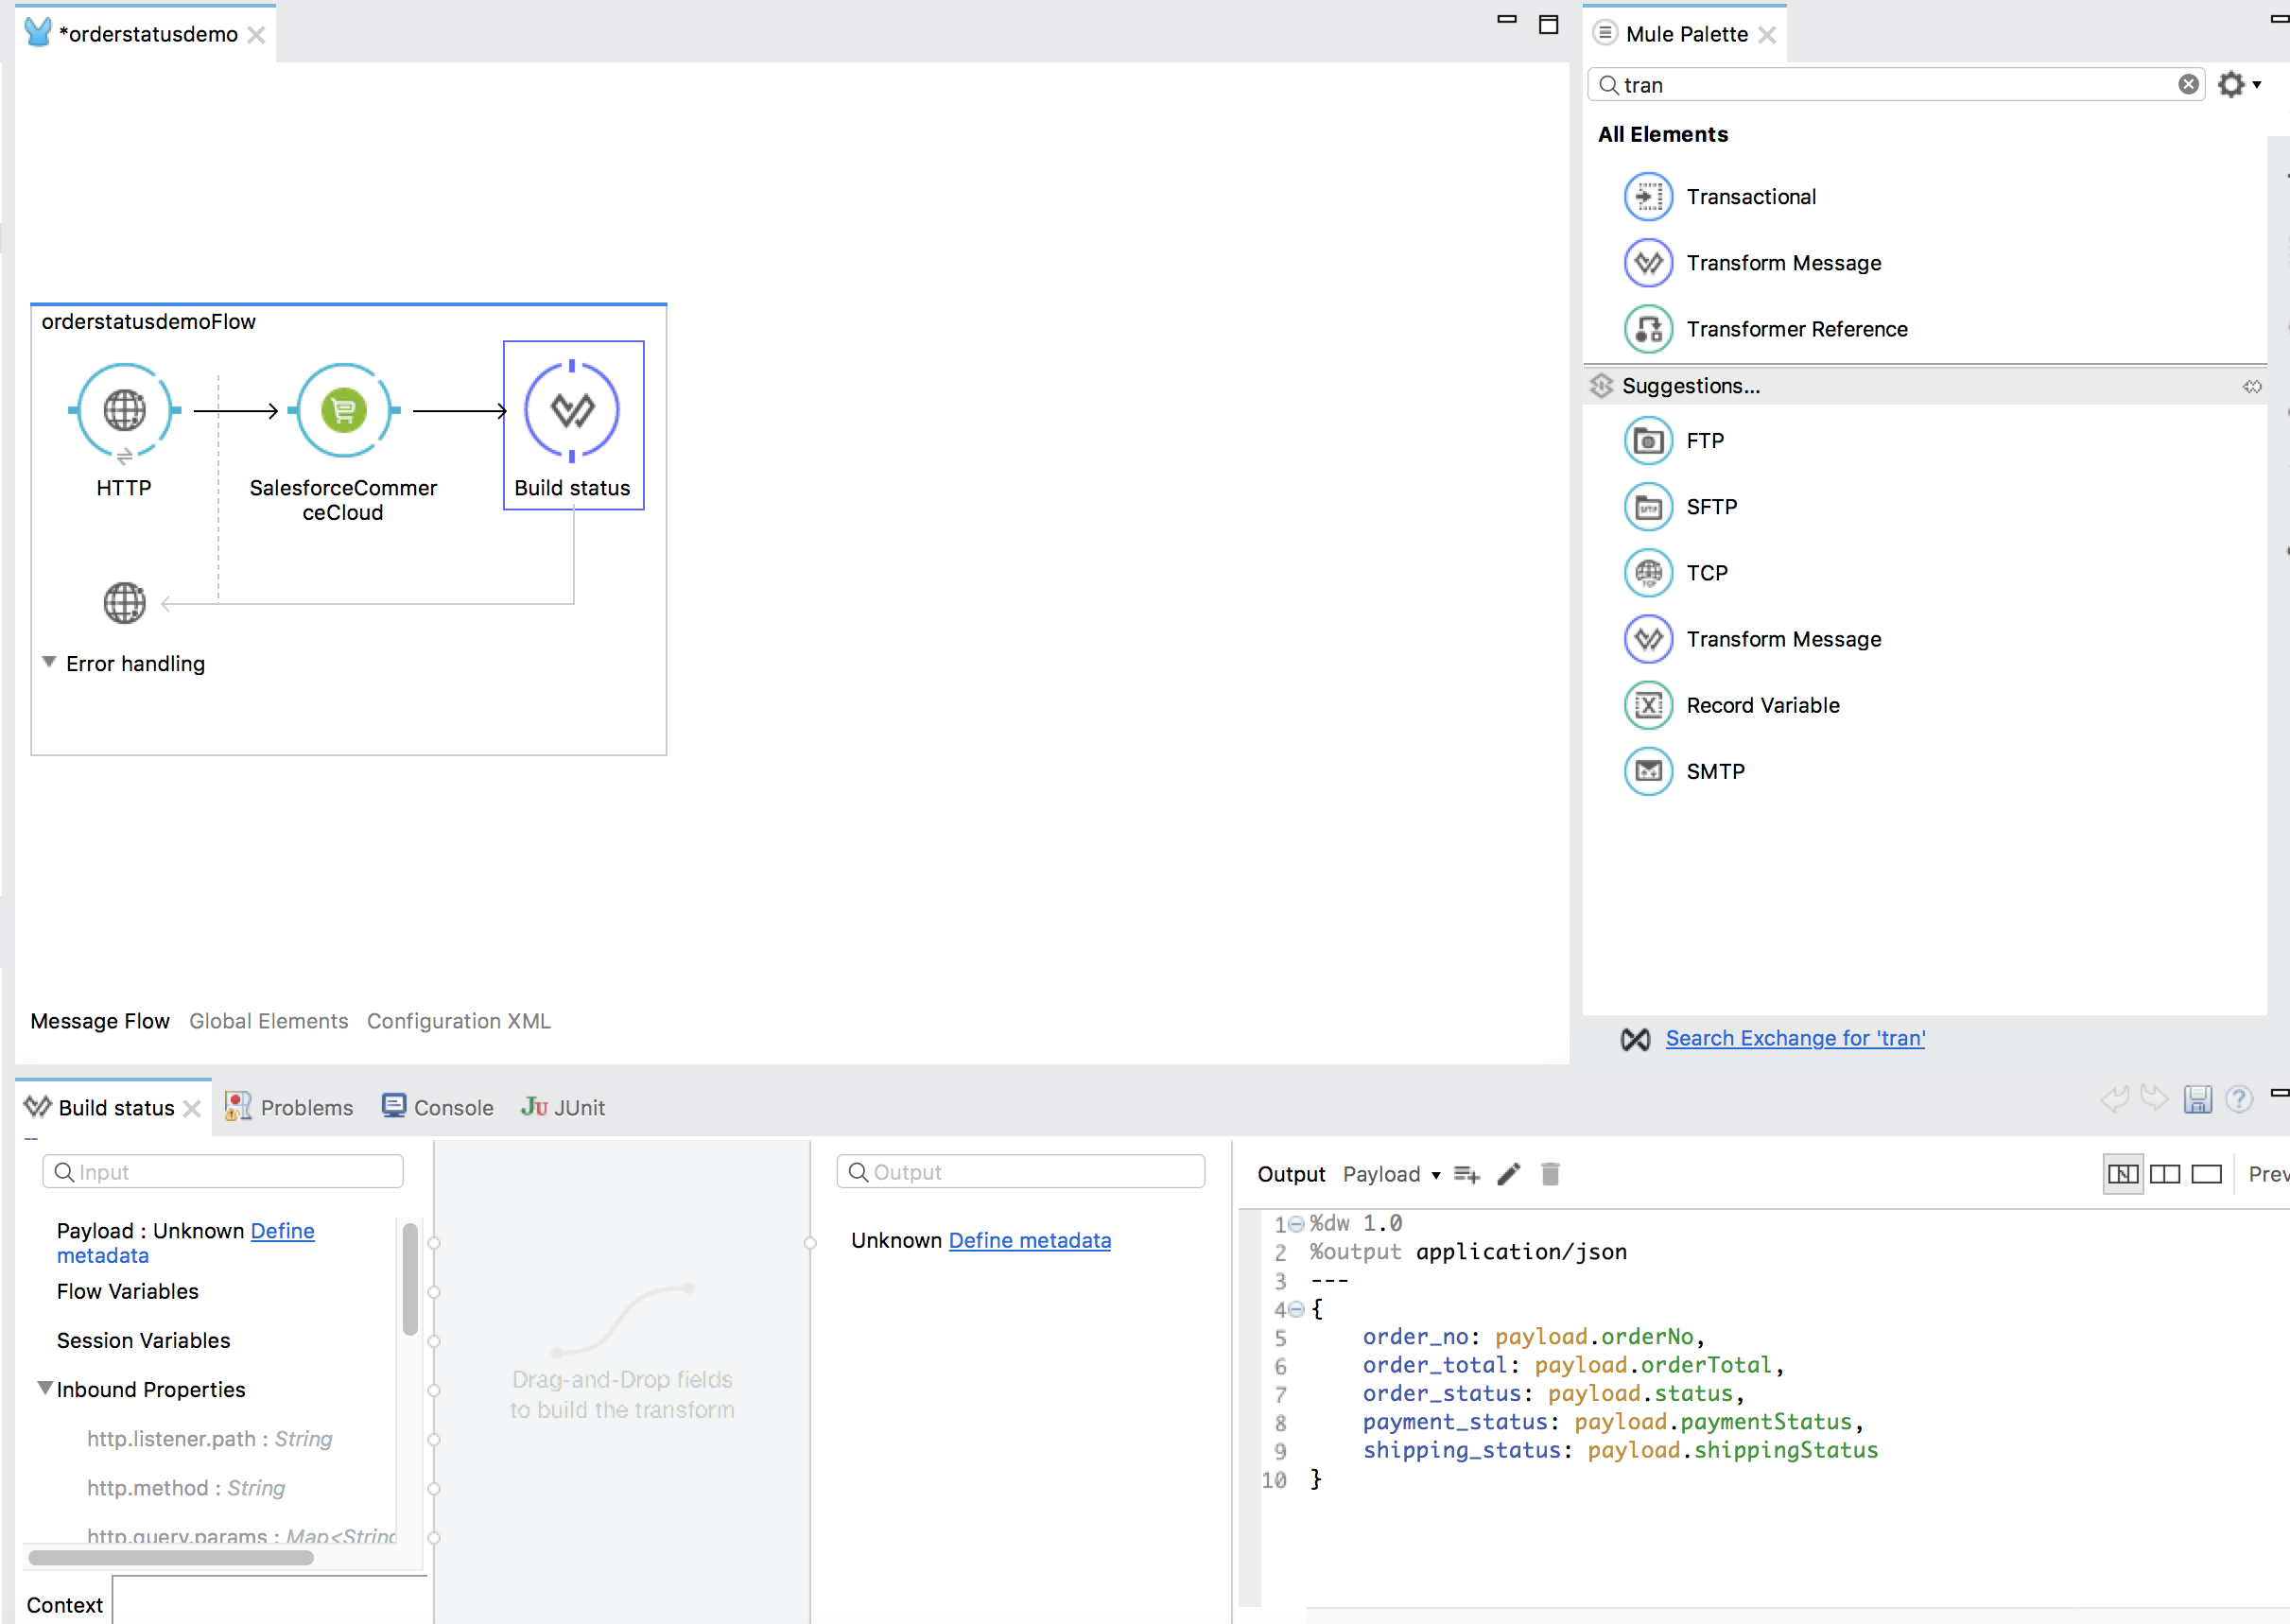
Then you can add a Transform Message and use the following snippet to extract the order status from the response.
%dw 1.0
%output application/json
---
{
	order_no: payload.orderNo,
	order_total: payload.orderTotal,
	order_status: payload.status,
	payment_status: payload.paymentStatus,
	shipping_status: payload.shippingStatus
}
-
Add a Catch Exception Strategy with a Set Variable to get the exception message
#[exception.cause.?message or exception.cause]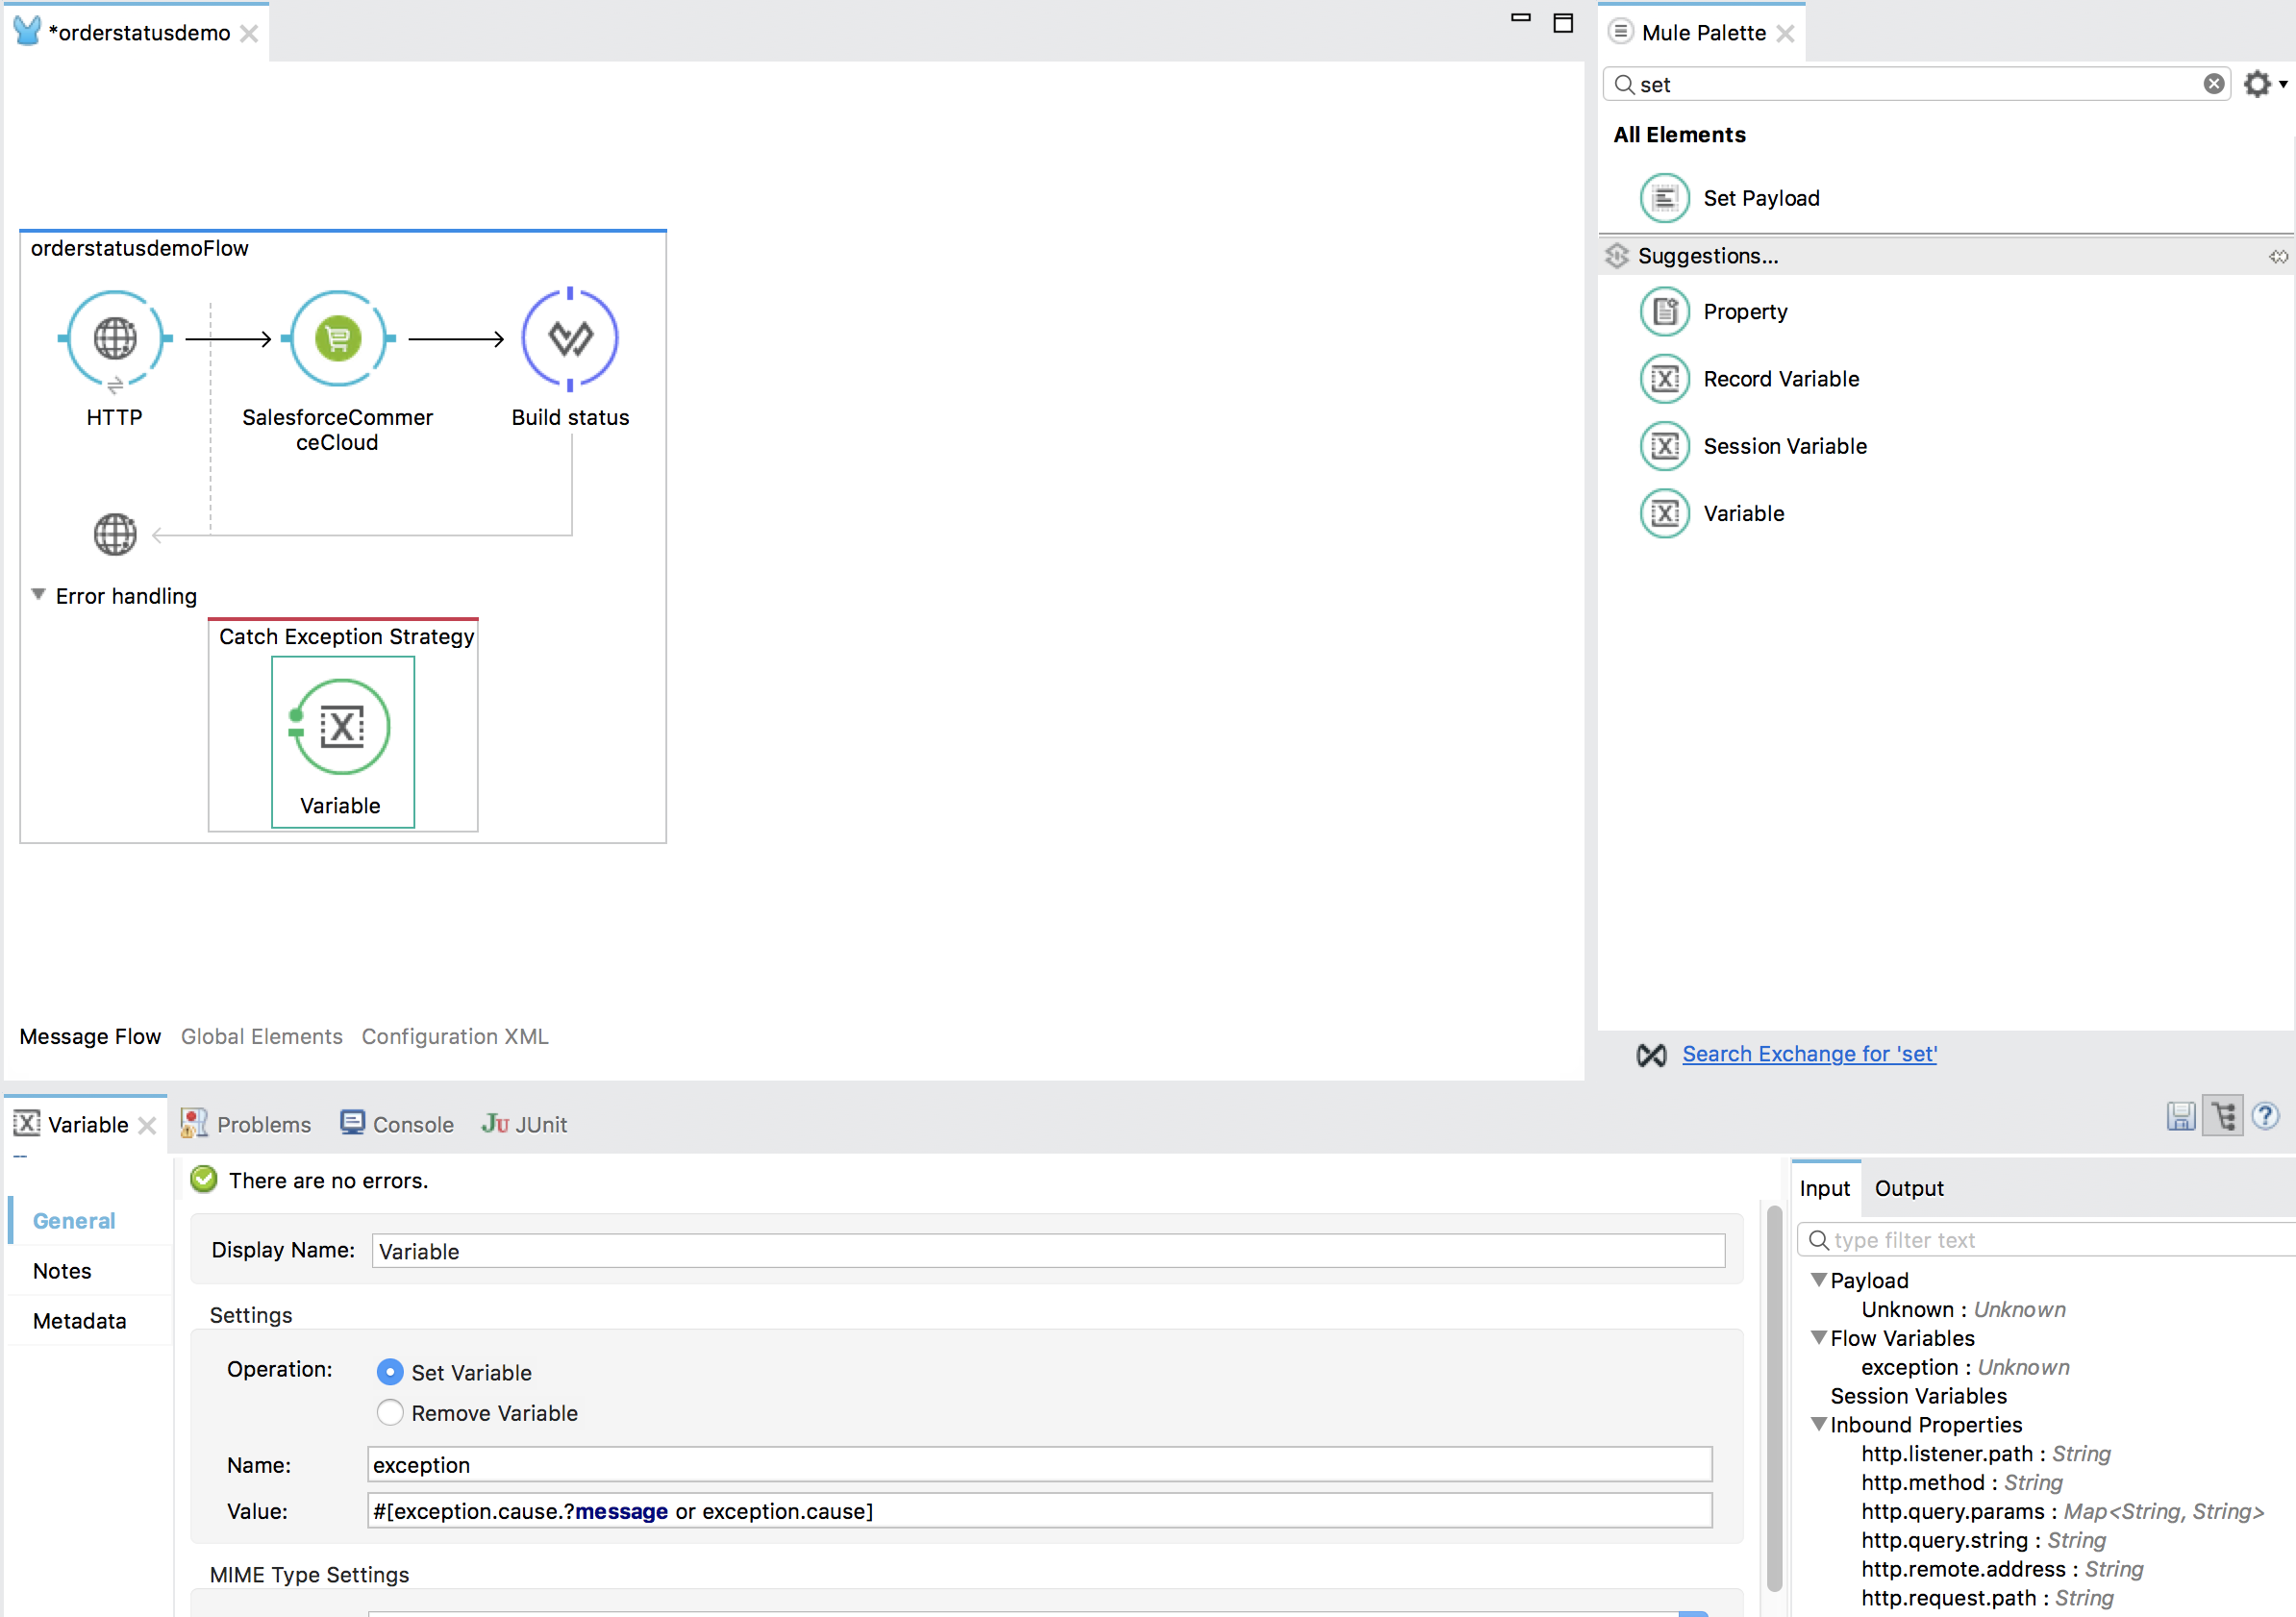
-
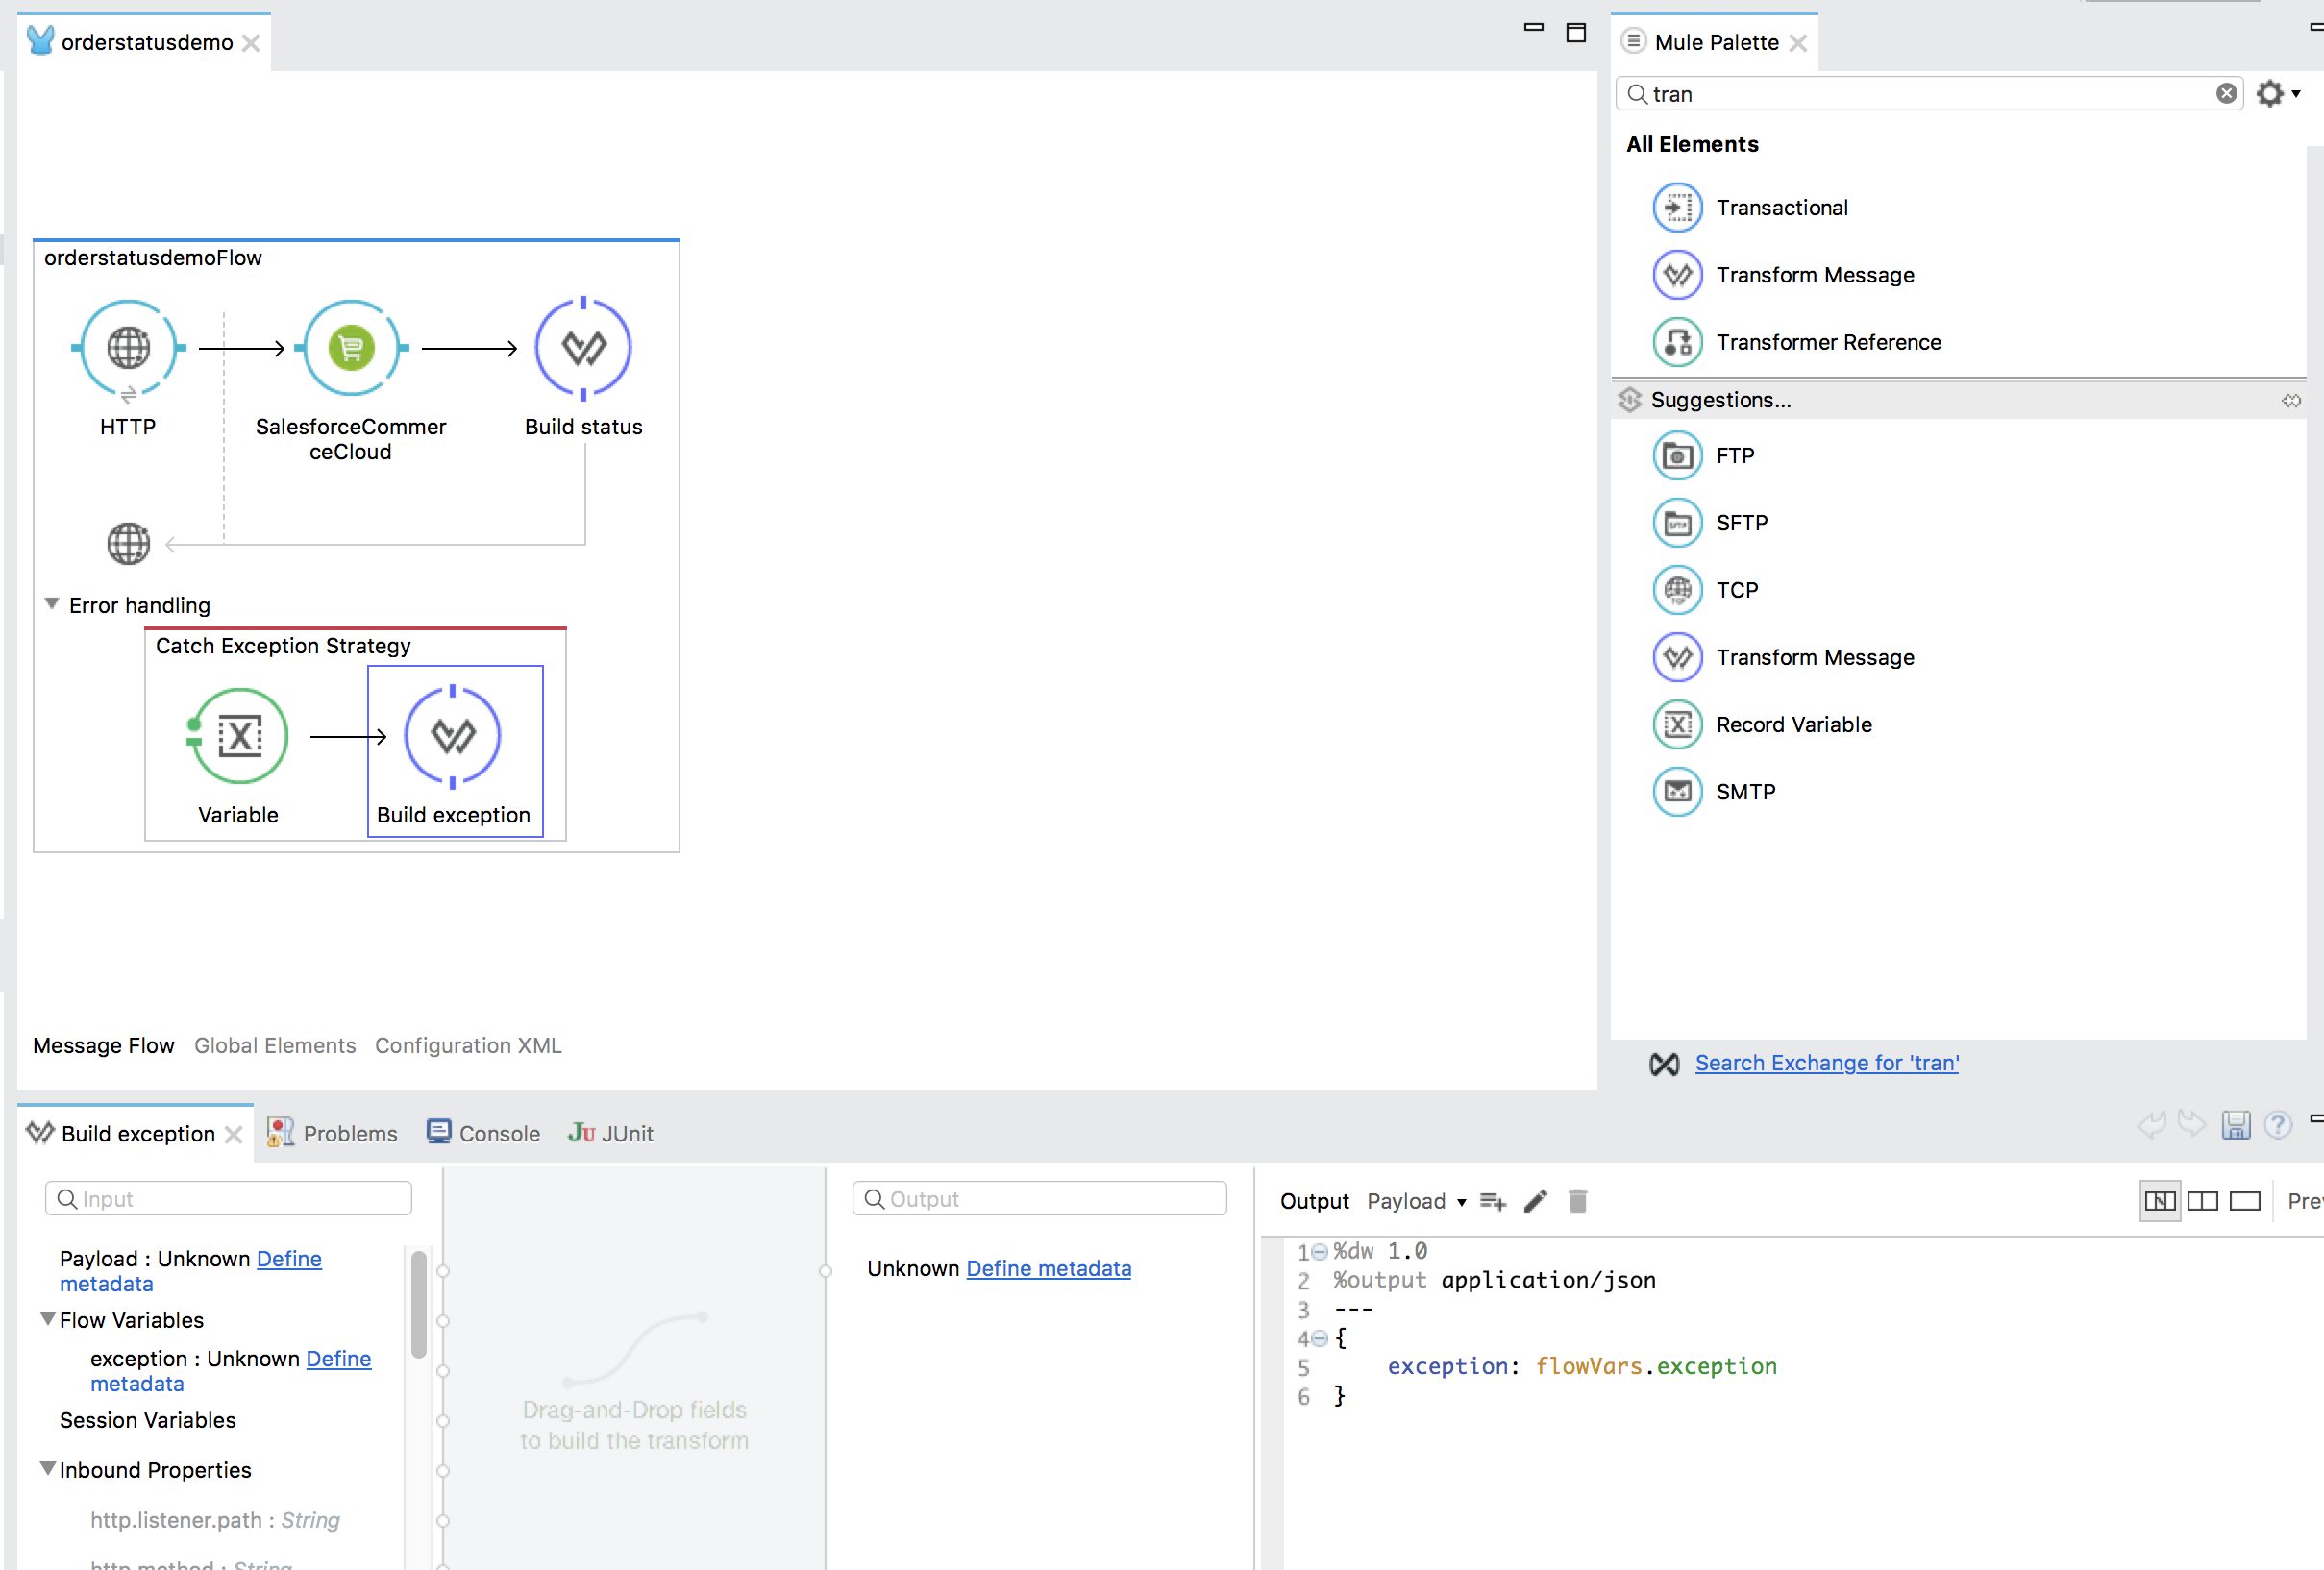
Then you can add a Transform Message and use the following snippet to display the exception message.
%dw 1.0
%output application/json
---
{
	exception: flowVars.exception
}
Connector Performance
To define the pooling profile for the connector manually, access the Pooling Profile tab in the applicable global element for the connector.
For background information on pooling, see Tuning Performance.