Introduction
This connector facilitates the integration with the Coupa’s API, providing a mean to access Coupa web services, you could use Coupa connector within mule flows to send and receive data using the Coupa API.
It provides access to Addresses, Approvals, Expense Report, Inventory Transactions, Invoices, Lookup Values, Purchase Orders, Requisitions, Suppliers and Users.
Read through this user guide to understand how to set up and configure a basic flow using the connector. Track feature additions, compatibility, limitations and API version updates with each release of the connector using the Connector Release Notes. Review the connector operations and functionality using the demo application.
MuleSoft maintains this connector under the Certified support policy.
Prerequisites
This document assumes that you are familiar with Mule, Anypoint Studio, Anypoint Core Components and Mule Flow Design Center.
Hardware and Software Requirements
For hardware and software requirements, please visit the Hardware and Software Requirements page.
Compatibility
| Software | Version |
|---|---|
Mule Runtime |
4.1.x and higher |
Installing the Connector
You can install the connector in Anypoint Studio using the instructions in Installing a Connector from Anypoint Exchange.
Configuring the Connector Global Element
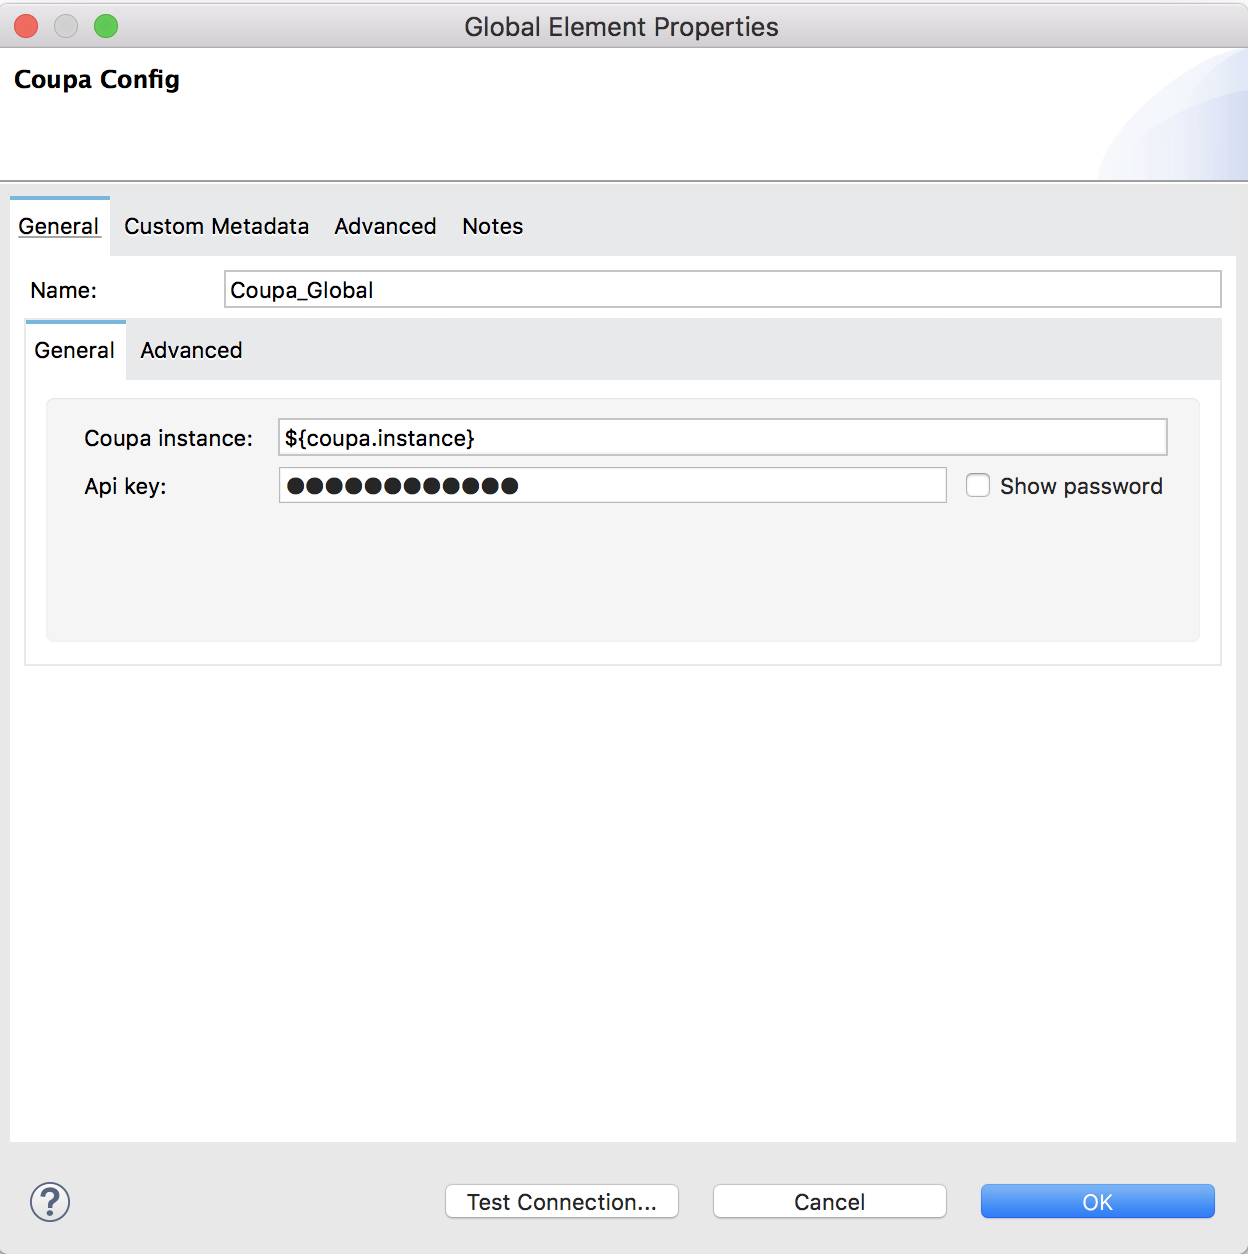
To use the Coupa connector in your Mule application, you must configure a global Coupa element that can be used by the Coupa connector. The Coupa connector offers the following global configuration(s), requiring the following credentials: Coupa API Key and Instance:
| Field | Description |
|---|---|
Coupa API key |
Enter the API Key retrieved from your Coupa admin or Integration Architect for generating and providing the key to you. |
Instance |
Each Coupa customer has their own url, of the form customer_name.coupahost.com. |
Using the Connector
Connector Namespace and Schema
When designing your application in Studio, the act of dragging the connector from the palette onto the Anypoint Studio canvas should automatically populate the XML code with the connector namespace and schema location.
Namespace: http://www.mulesoft.org/schema/mule/coupa
Schema Location: http://www.mulesoft.org/schema/mule/coupa/current/mule-coupa.xsd
|
Tip
|
If you are manually coding the Mule application in Studio’s XML editor or other text editor, define the namespace and schema location in the header of your Configuration XML, inside the <mule> tag.
|
<mule xmlns:coupa="http://www.mulesoft.org/schema/mule/coupa" xmlns="http://www.mulesoft.org/schema/mule/core"
	xmlns:doc="http://www.mulesoft.org/schema/mule/documentation"
	xmlns:xsi="http://www.w3.org/2001/XMLSchema-instance" xsi:schemaLocation="http://www.mulesoft.org/schema/mule/core http://www.mulesoft.org/schema/mule/core/current/mule.xsd
http://www.mulesoft.org/schema/mule/coupa http://www.mulesoft.org/schema/mule/coupa/current/mule-coupa.xsd">
	  <!-- put your global configuration elements and flows here -->
</mule>|
Tip
|
Inside the
|
Demo Mule Applications Using Connector
Existing demo demonstrate how to use the connector for:
Example Use Case
The following example shows how to get an invoice using the connector:
Get an invoice
-
In Anypoint Studio, click File > New > Mule Project, name the project, and click OK.
-
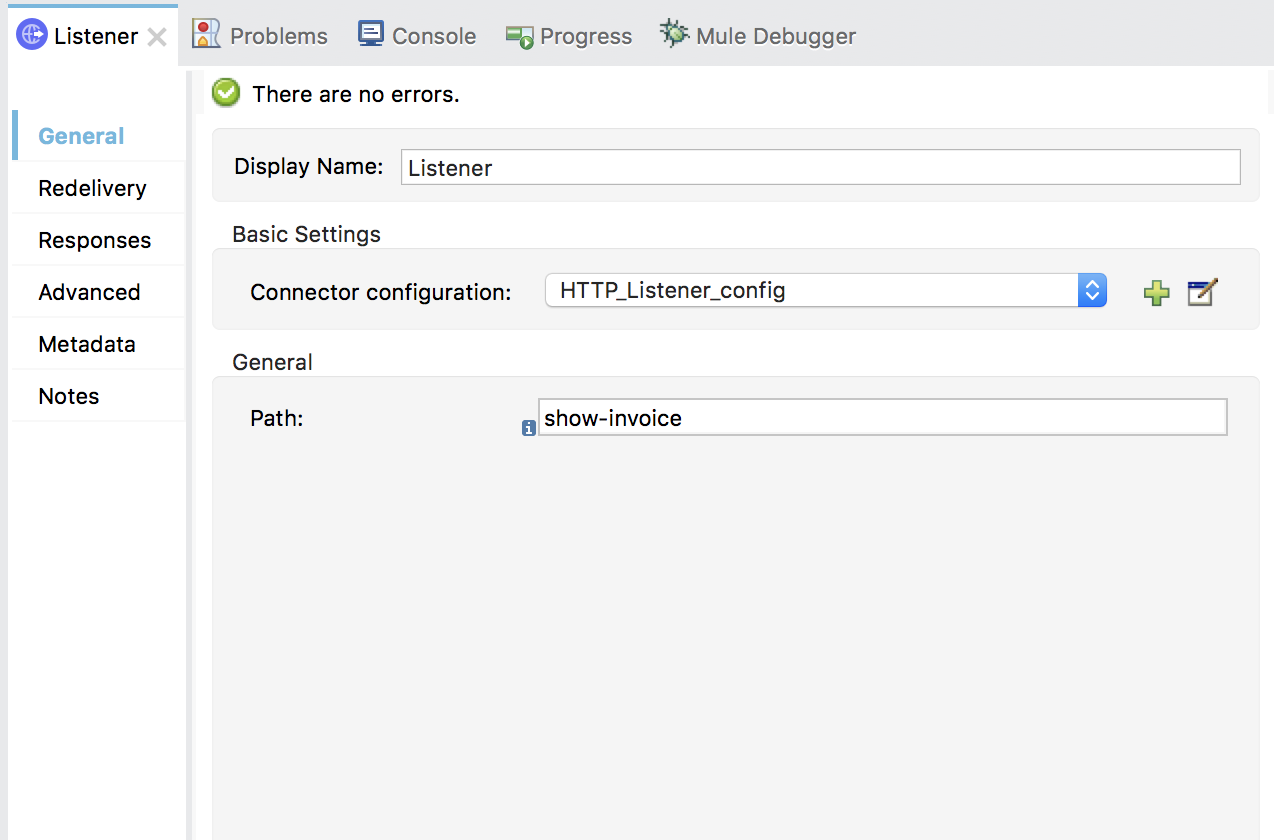
In the Mule Palette, click on the "HTTP" group and select the Listener component. Now drag and drop it into the flow designer.
-
First, we need to create a configuration for the HTTP listener before using it. Click on the HTTP listener and add new configuration by pressing the green plus icon.
-
Leave the defaults and click OK.
-
Set the value to "show-invoice".
-
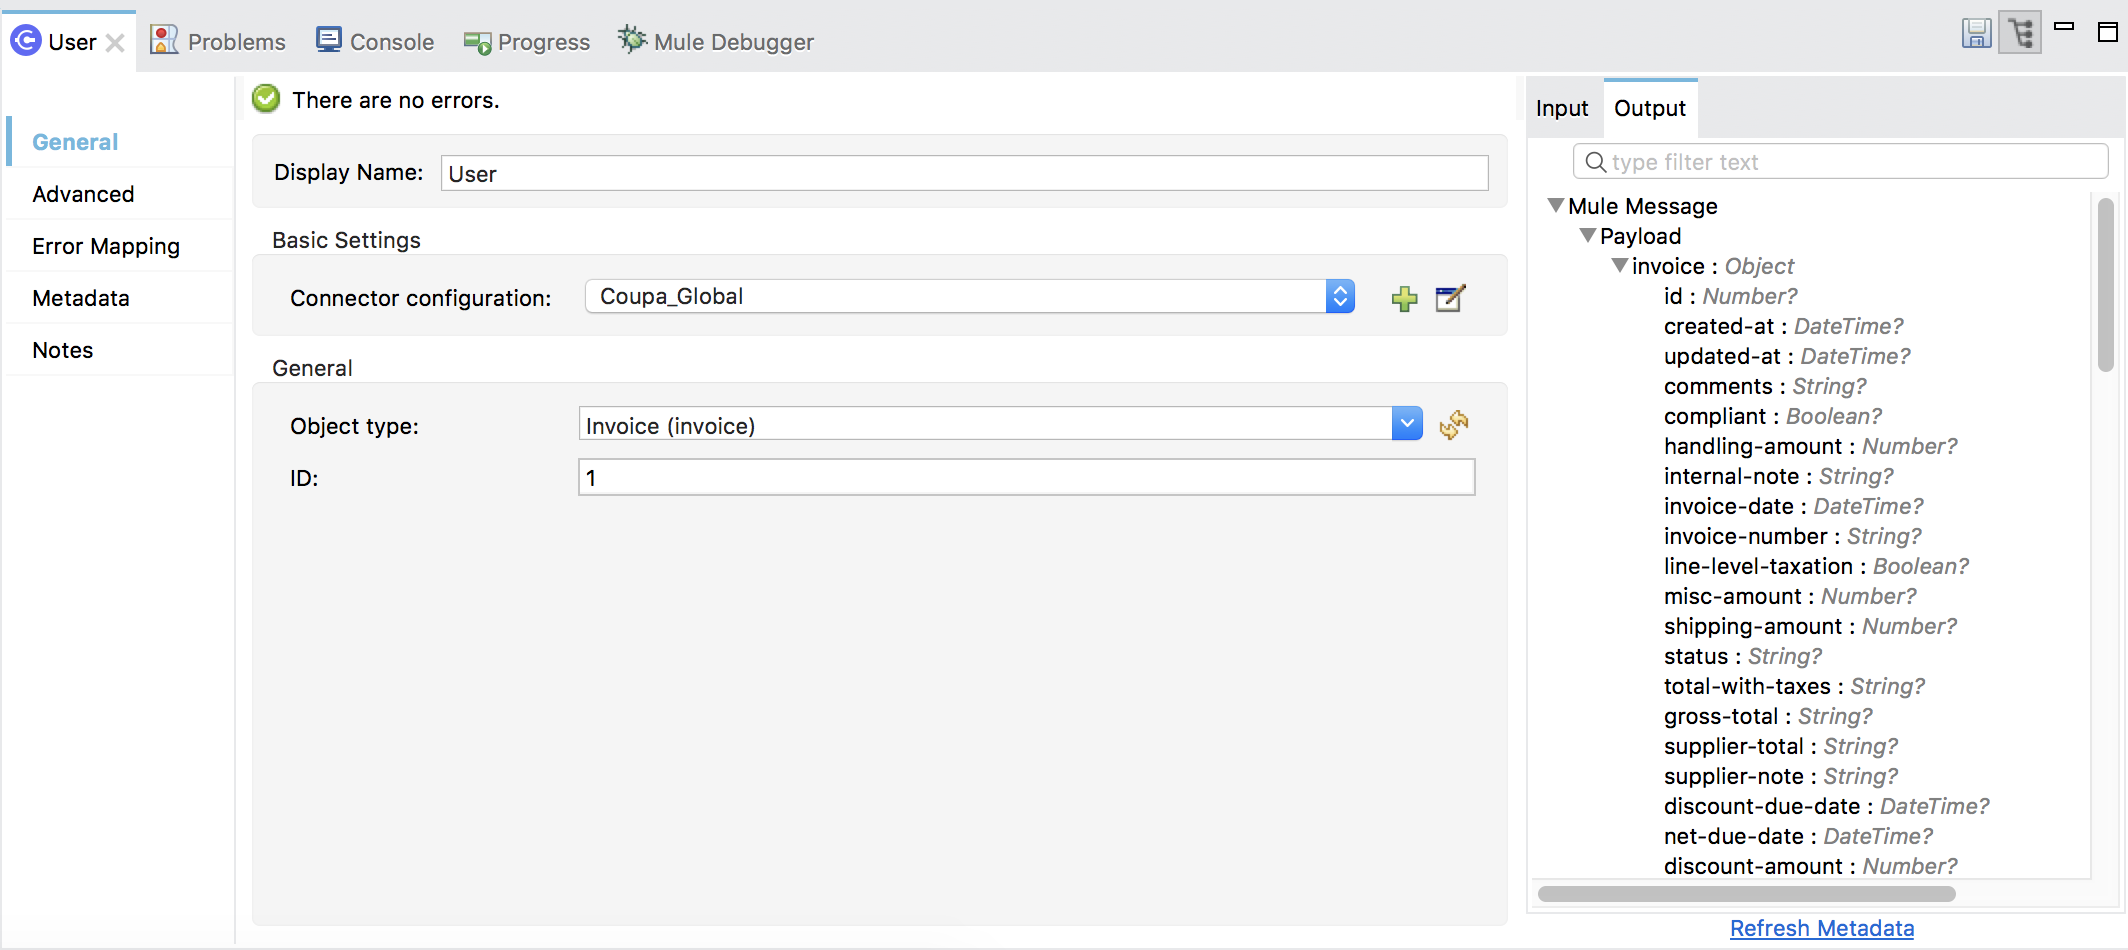
In the Mule Palette, click on the "Coupa" group and drag and drop Get into the flow designer, then create a new configuration and set your API Key and the instance URL.
-
In the Coupa General section, for Object type pick Invoice (invoice) and put 1 (or any valid invoice id) in the ID field.
|
Note
|
After an object type is selected, the output metadata view is getting generated based on the pick |
-
Finally, you can try the demo making a request to http://localhost:8081/show-invoice
Error handling
The connector might generate a different type of errors while using it in flows. It is good to configure separate strategy for every error type using the Error Handling components.
Coupa Errors:
-
COUPA:CONNECTIVITY
-
COUPA:EXECUTION
-
COUPA:INVALID_AUTH
-
COUPA:INVALID_PARAMS
-
COUPA:UNKNOWN
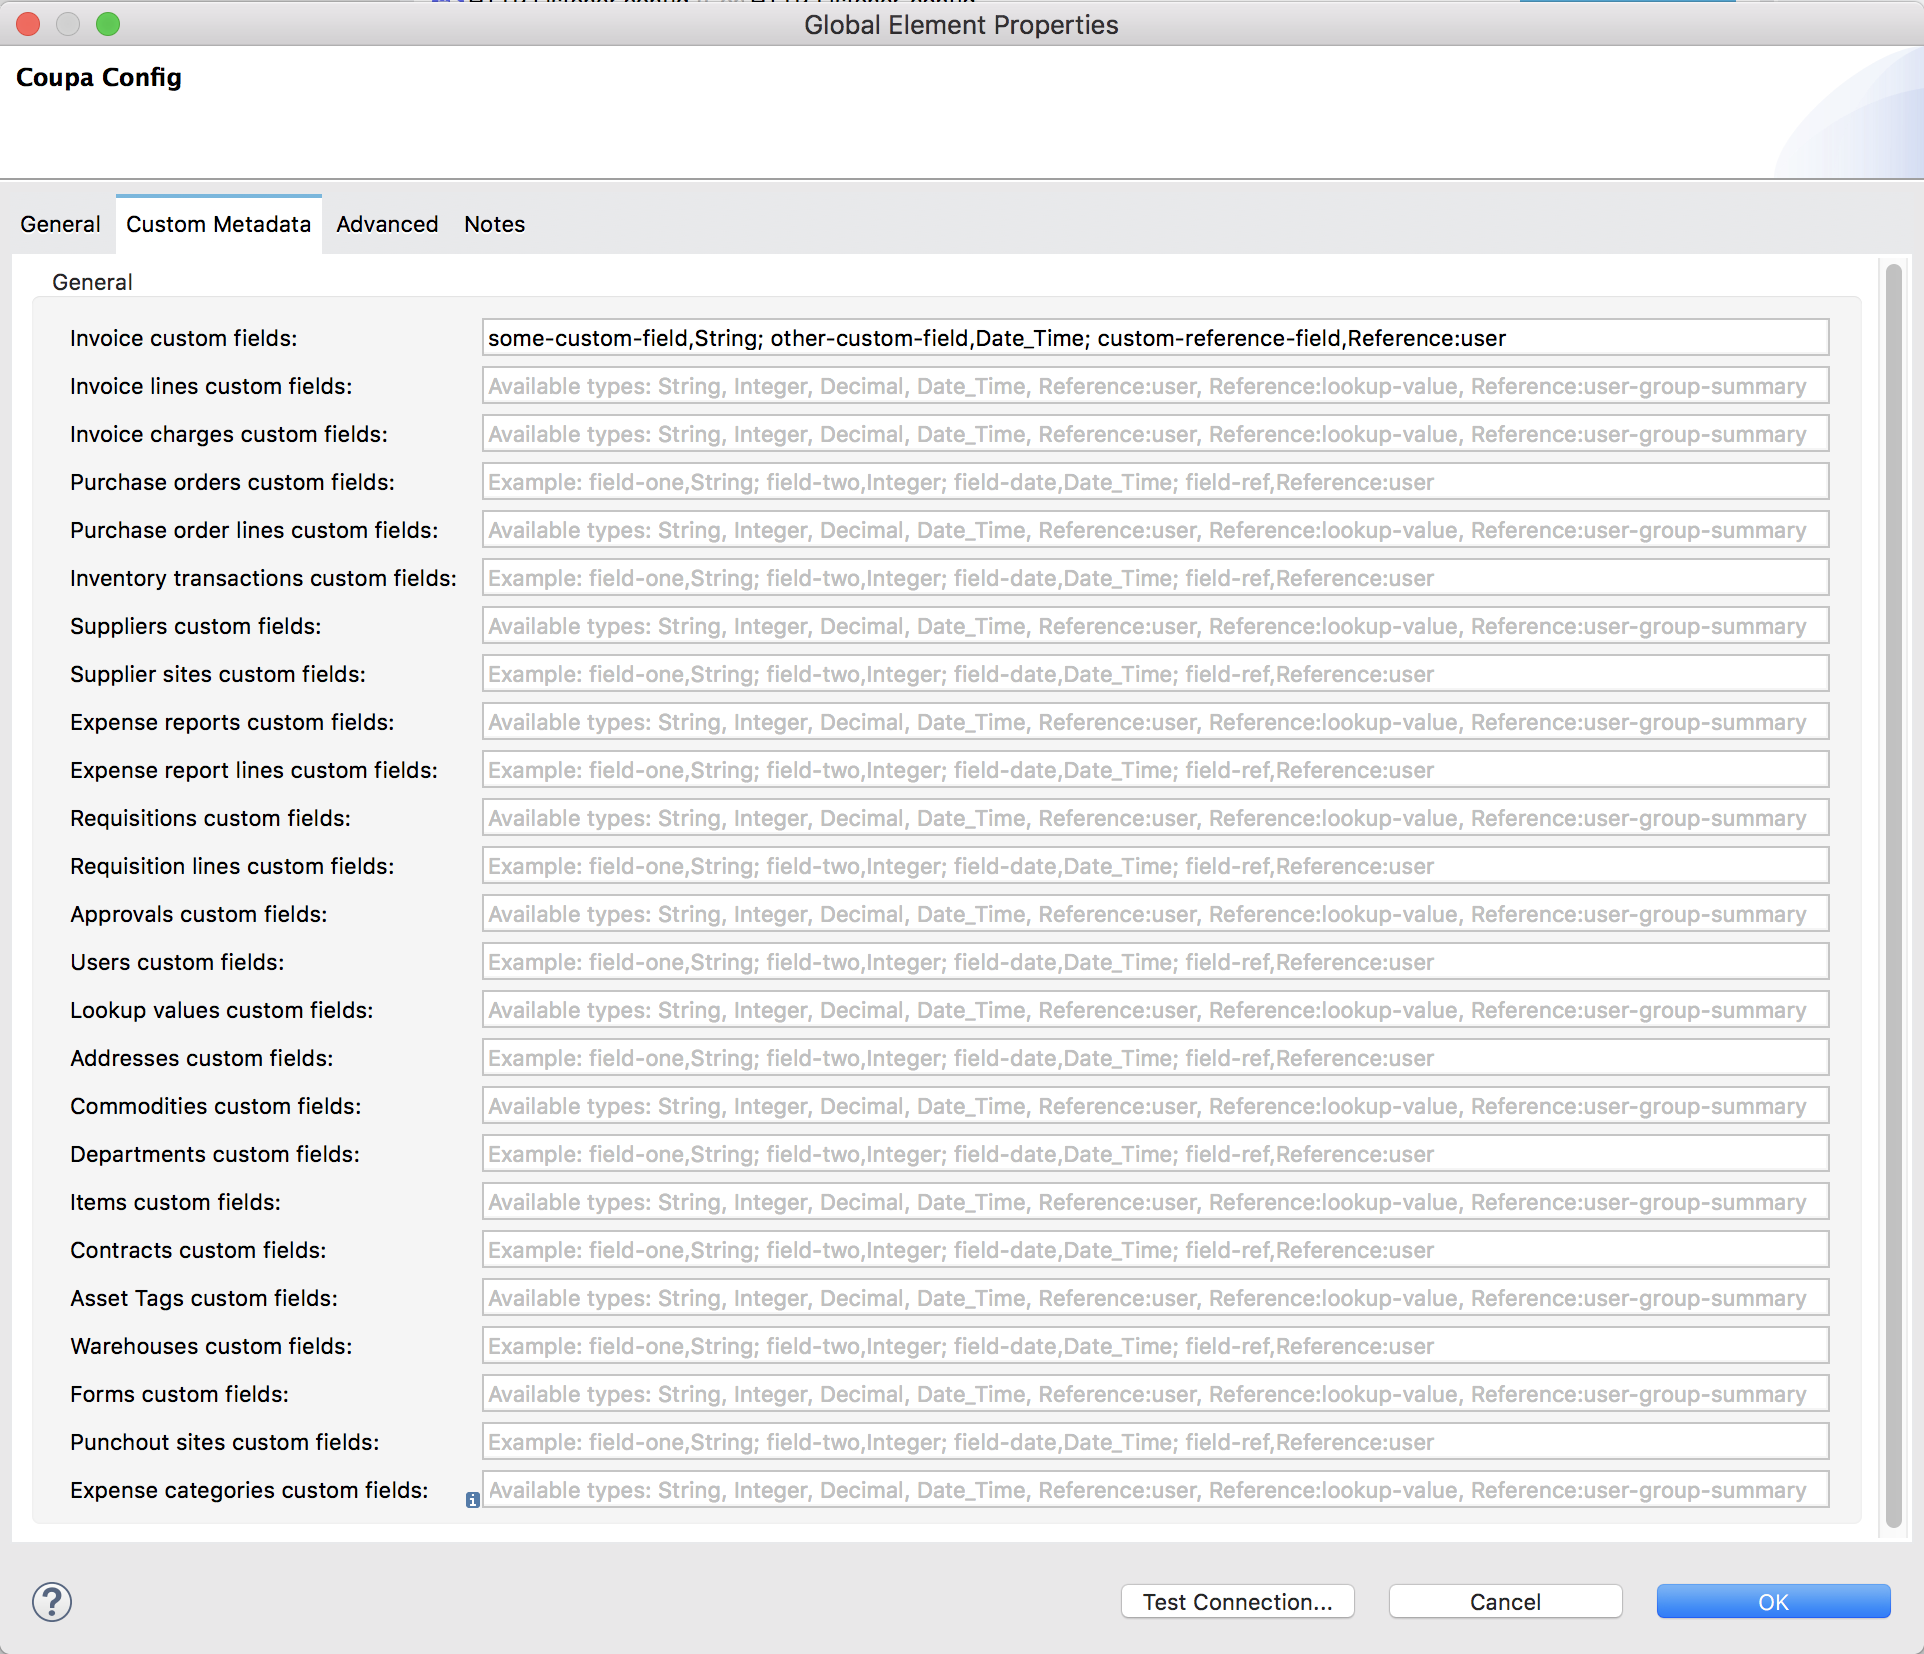
Configuring custom fields
Custom fields can be added on top of the basic datasense fields. Available data types for custom fields are String, Date, Date_Time, Integer, Double, Float, Long, Decimal, Boolean and Reference.
Example configuration:
some-custom-field,String; other-custom-field,Date_Time; custom-reference-field,Reference:user
Custom fields can be add in the Custom Metadata tab of the Coupa Global Configuration.
Resources
-
Access the Coupa API References
-
Access the Coupa API operators
-
Access the Coupa API Arguments
-
Access the Coupa API special actions